Team –
It’s the final day of the year, and as I mentioned in the post title “The Enterprise Lab – Overview” our internal lab has been feeling a little left out lately. What better way to get ahead of those new year resolutions than to start a day early! Today, we’re going to upgrade our Florida vCenter from 7.0.3 to 8.0.1. If you’re a seasoned VMware user, then this process is probably already familiar to you as it’s been the same for some time now. We’re going to spend a little time discussing each phase of the upgrade and what happens (at a 10,000-foot view).
Pre-Requisite Checklist
Before we start, you’re going to make sure that we have and do a few things to prepare for the upgrade just to make the process a little more seamless. First, let’s run through the things you absolutely need –
- The VCSA 8.0.1c ISO downloaded from VMware’s Customer Connect page.
- [Optional] Rename your existing VCSA appliance’s inventory name if you wish to align inventory names with hostnames (I’m a stickler for this).
- SSO Administrator credentials.
- Existing VCSA appliance ‘root’ credentials.
- Hostname or IP address and ESXi credentials to the host where the existing VCSA appliance workload is running with enough permissions to control the VM.
- Hostname of IP address and ESXi credentials to the host where the new 8.0.1c appliance will run.
- Password for the ‘root’ account on the new VCSA appliance.
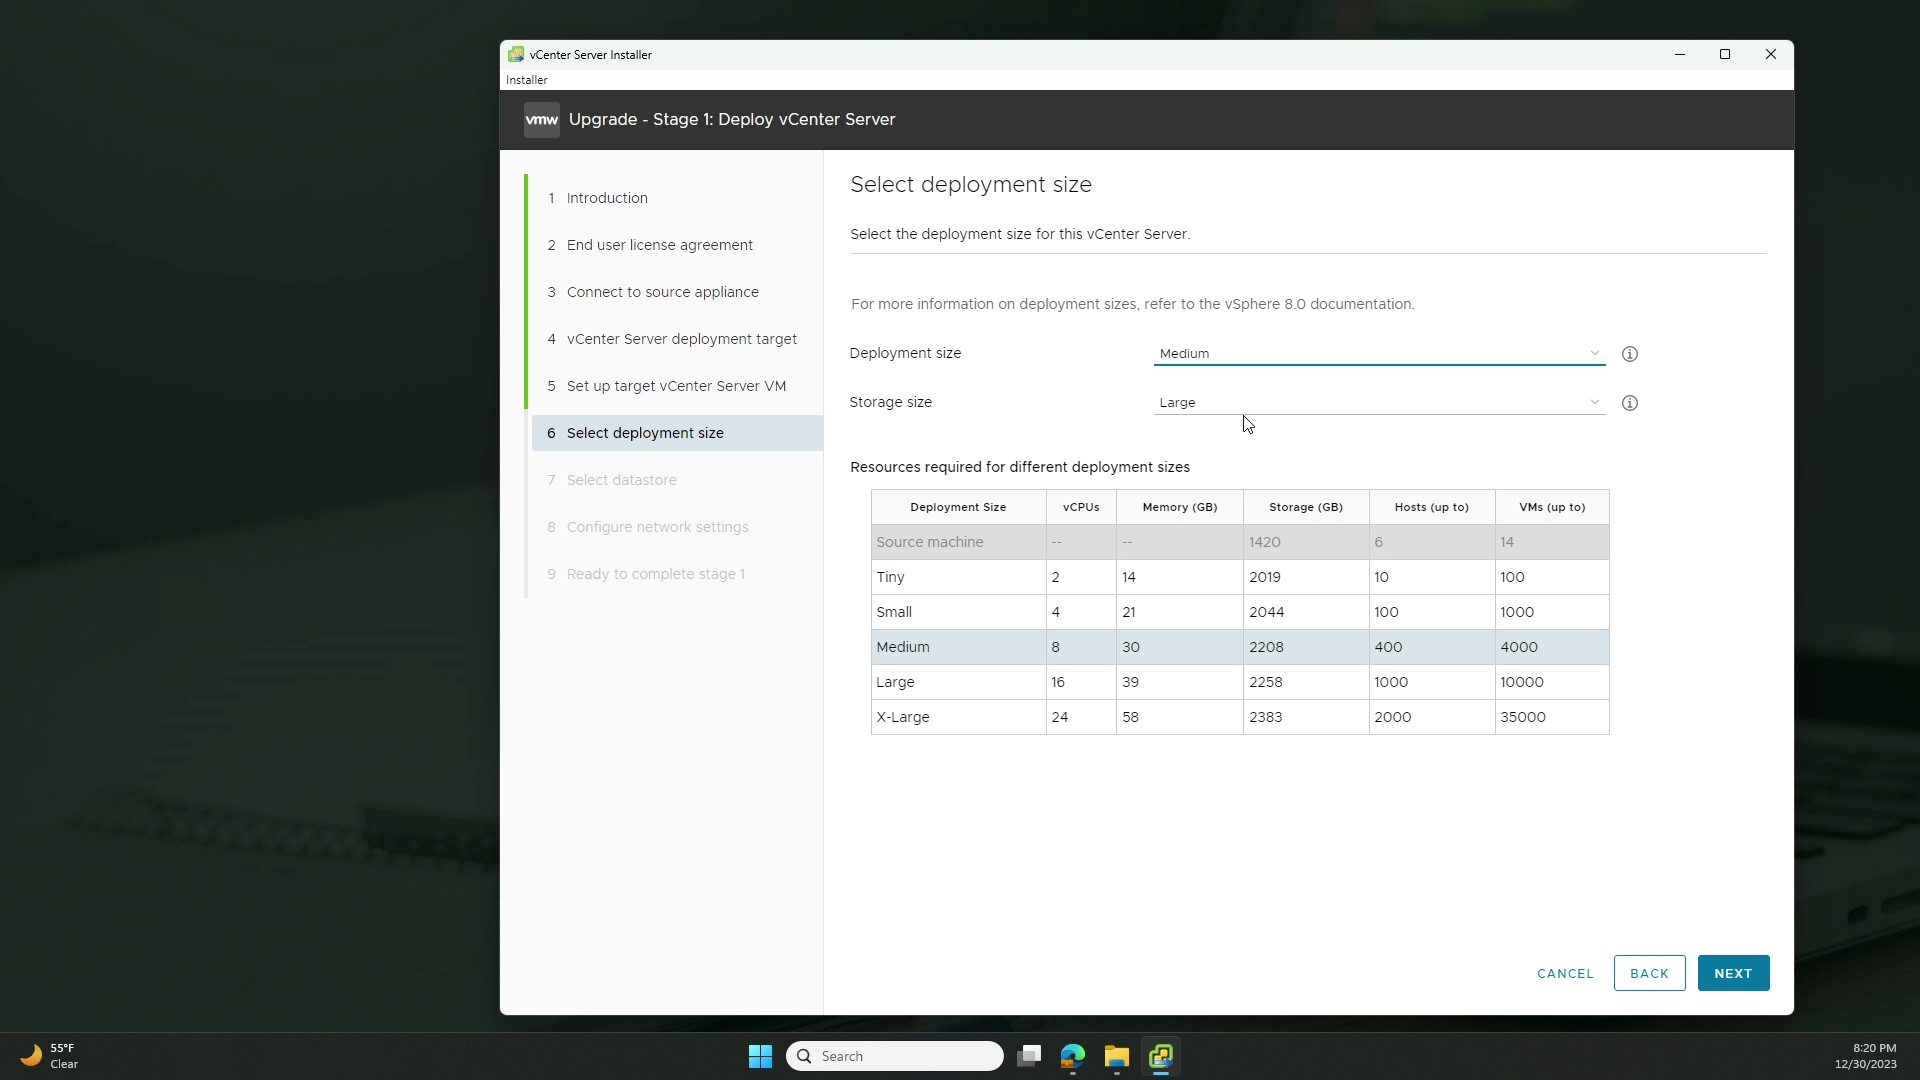
- A determined deployment size for the new VCSA appliance. Sizing metrics are visible on the installer GUI, but I’ve included a link to VMware’s documentation here.
- The port group that the new appliance’s network will attach to.
- (If statically assigning) A temporary, routed IP address, it’s netmask, and gateway accompanied by DNS server(s).
Once you’ve readied yourself these items, we’re ready to being the process.
Ready, set, go…
Stage 1
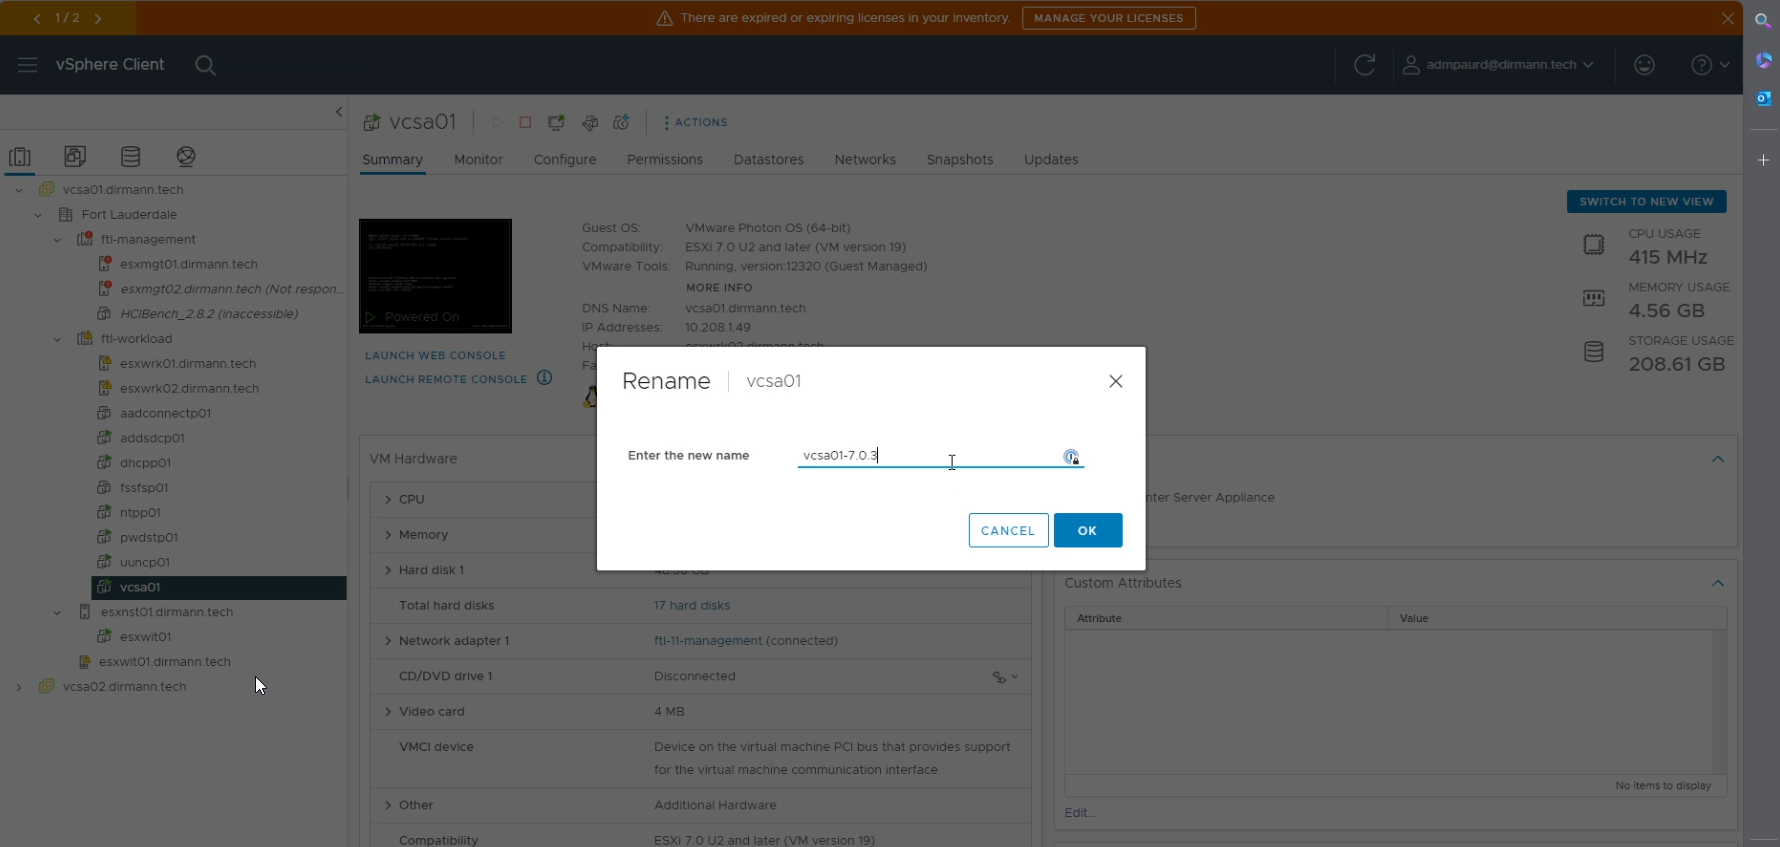
As I mentioned, I am a stickler for a consistency between vCenter inventory names and hostnames so to start I am going to rename my existing 7.0.3 appliance to something different because I want to re-use the current inventory name for our new appliance.
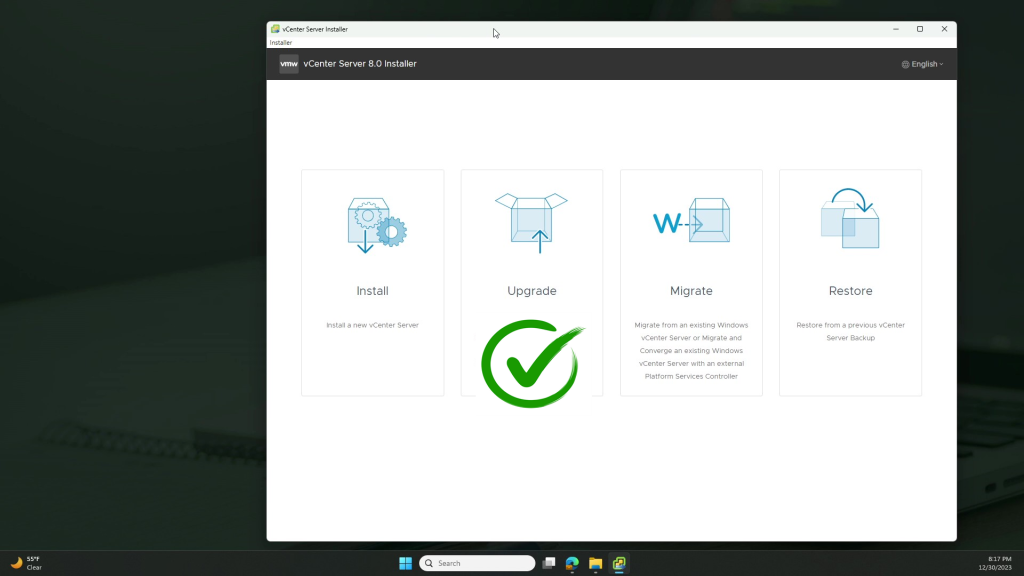
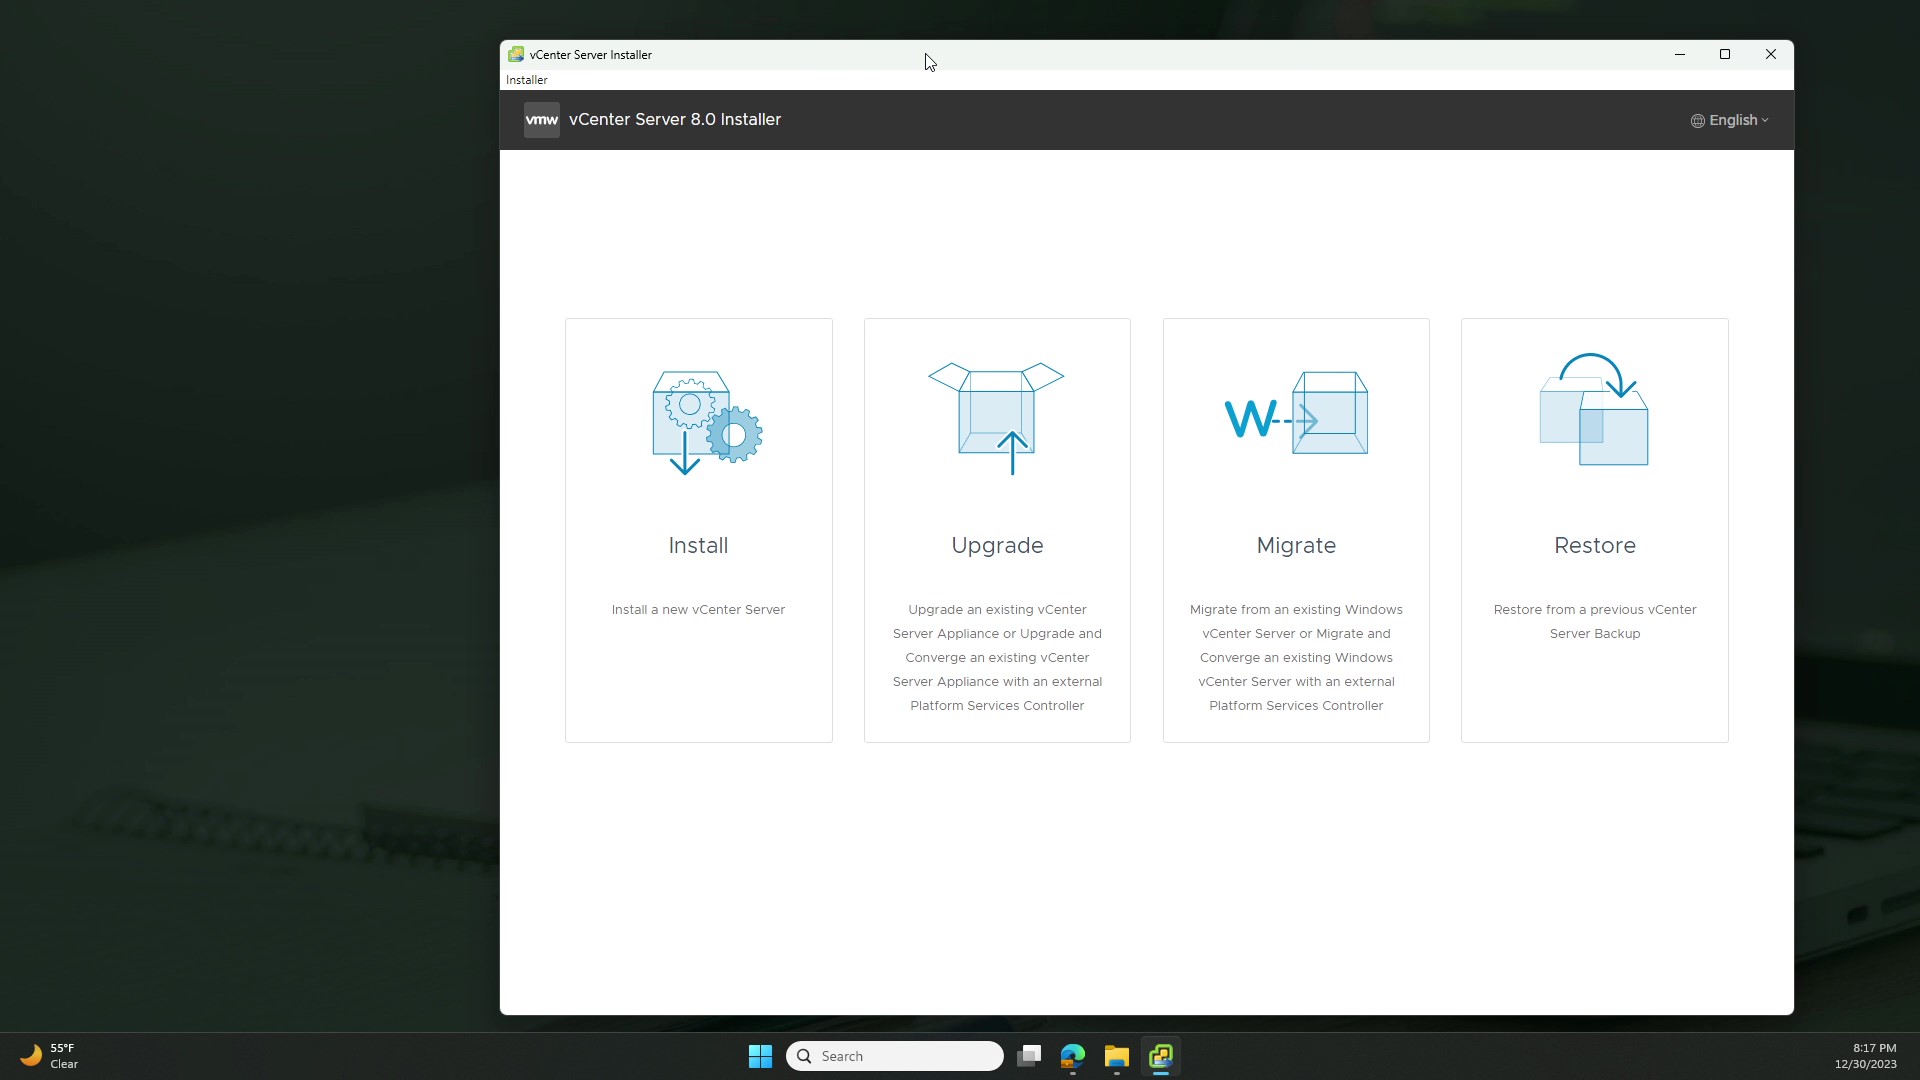
Next, it’s time to mount the ISO within your local OS and browse to the X:\vcsa-ui-installer\win32\installer.exe (this path is for Windows; X is the drive of the mounted ISO). When you launch this application, you be presented with the installer’s GUI. Select the ‘Upgrade’ option.
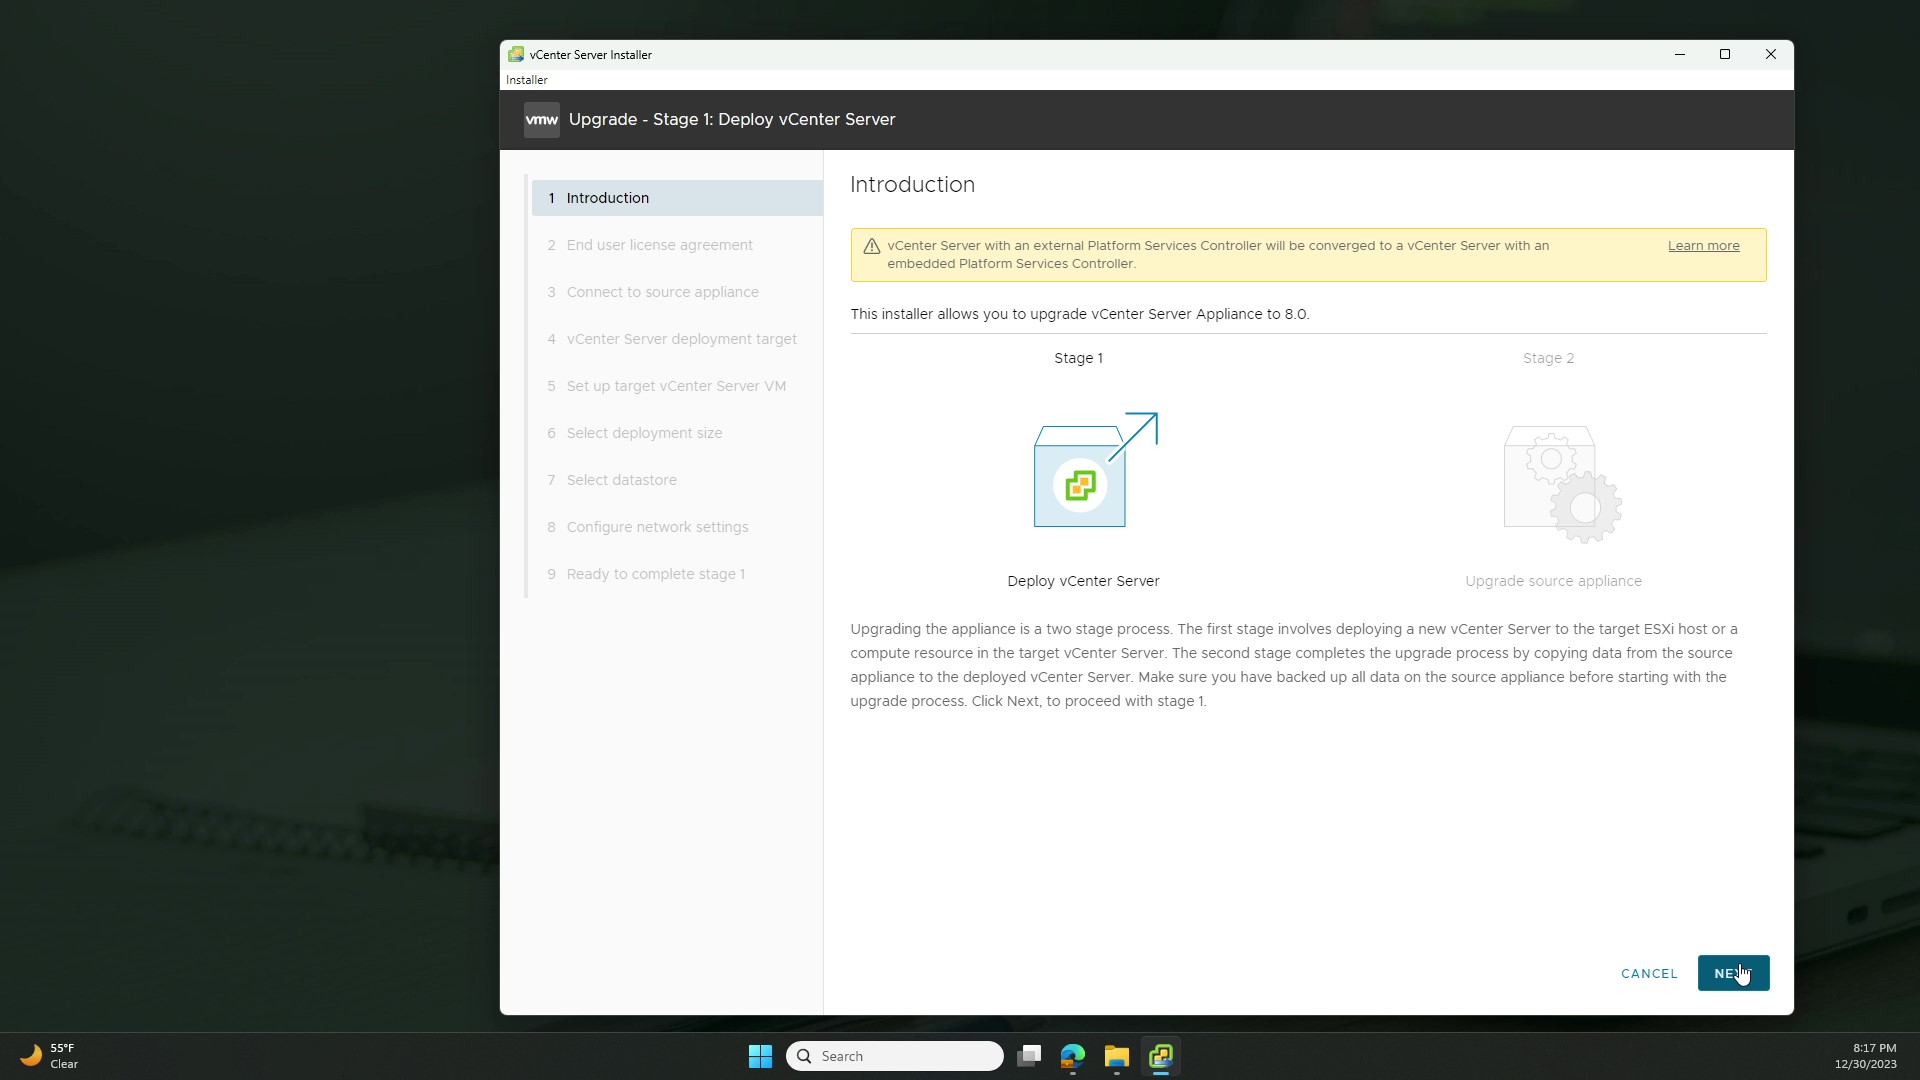
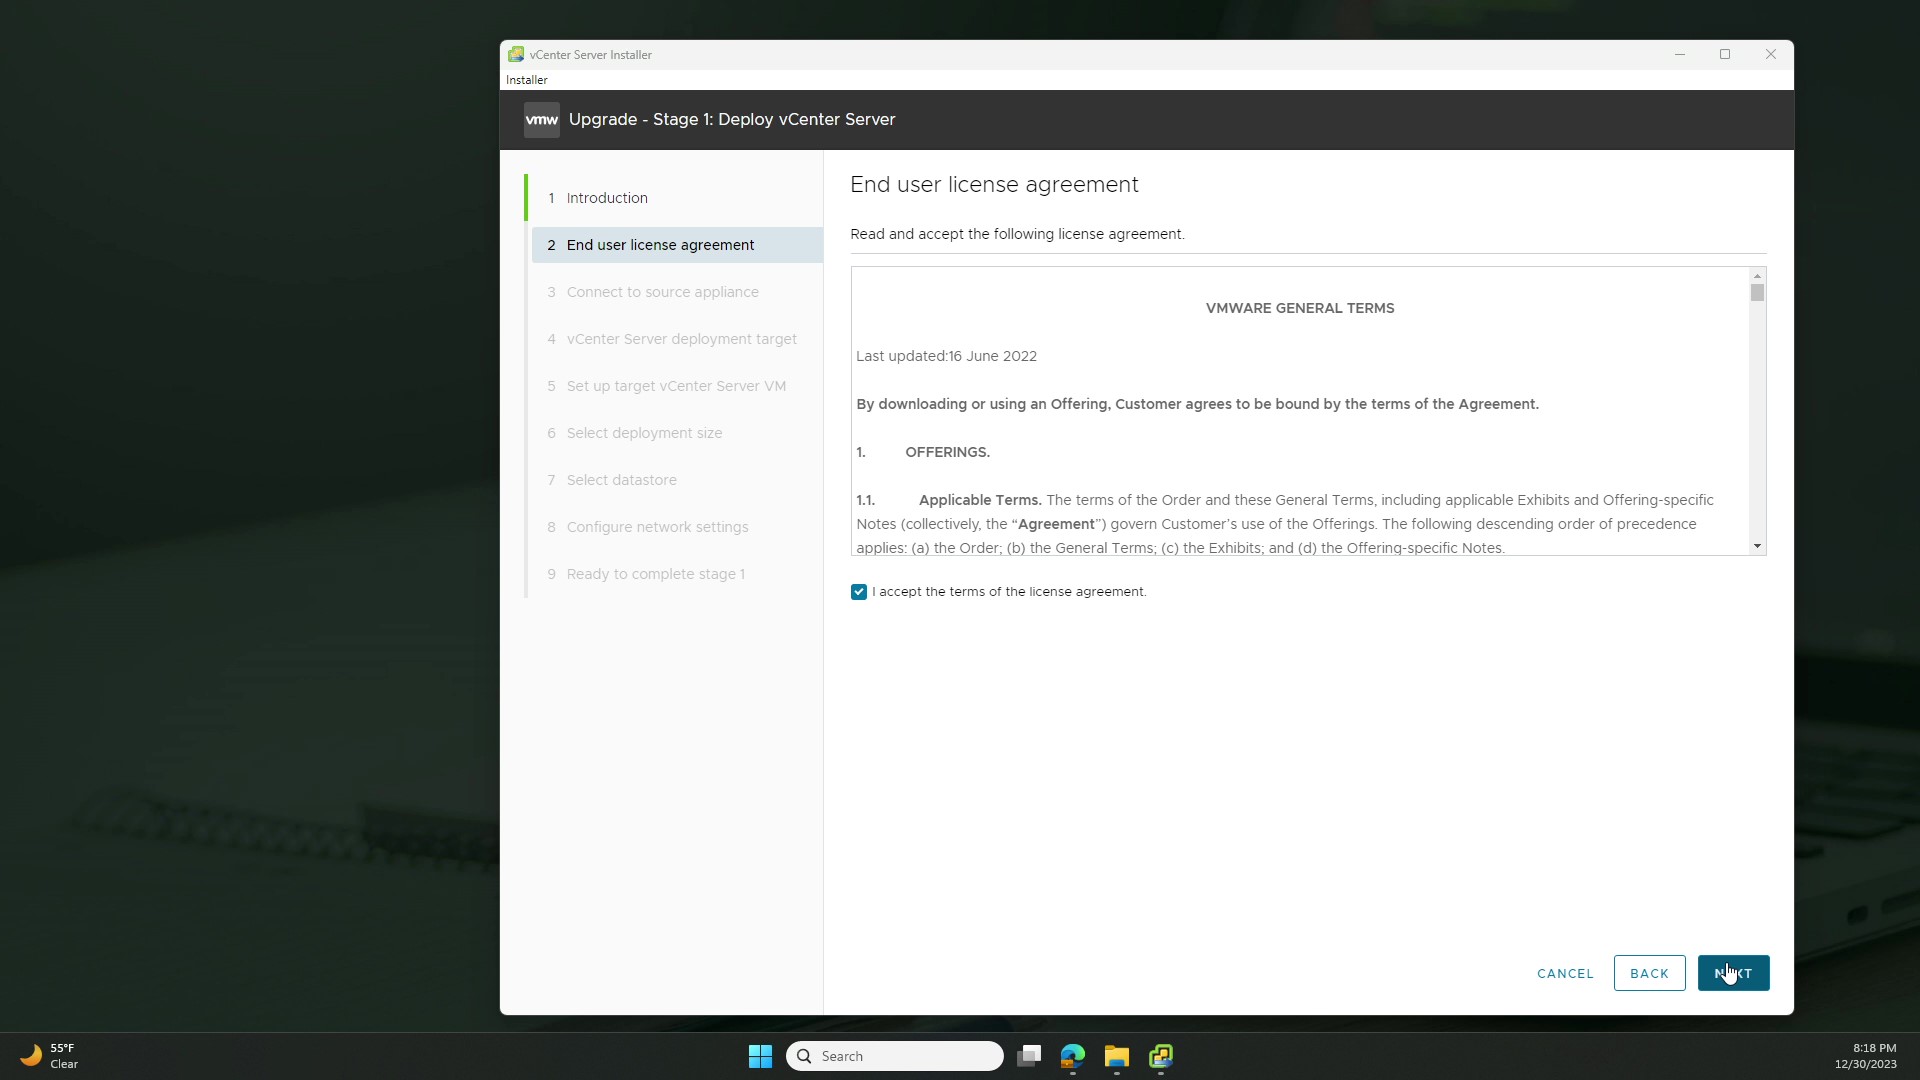
The first screen is just an overview of the process for Stage 1, so click ‘Next’, and read through and accept the EULA agreement on the following screen.
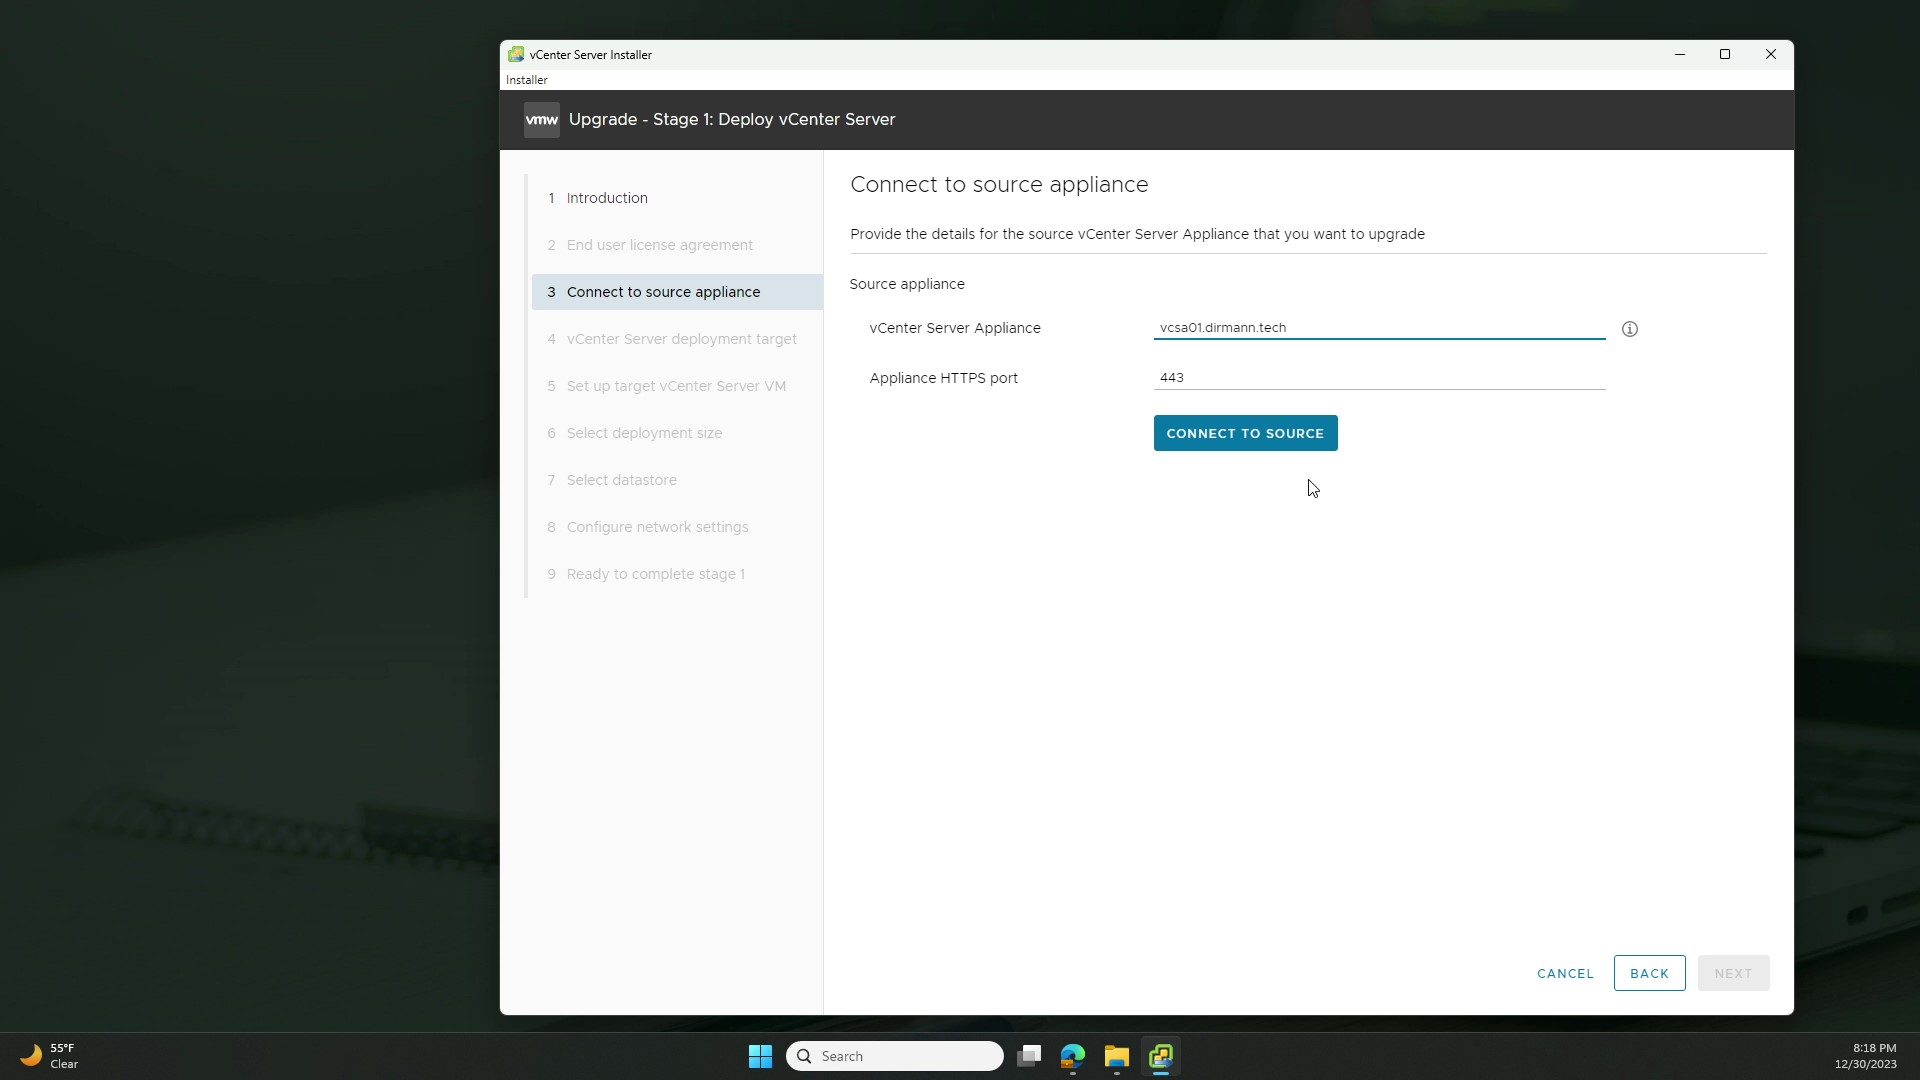
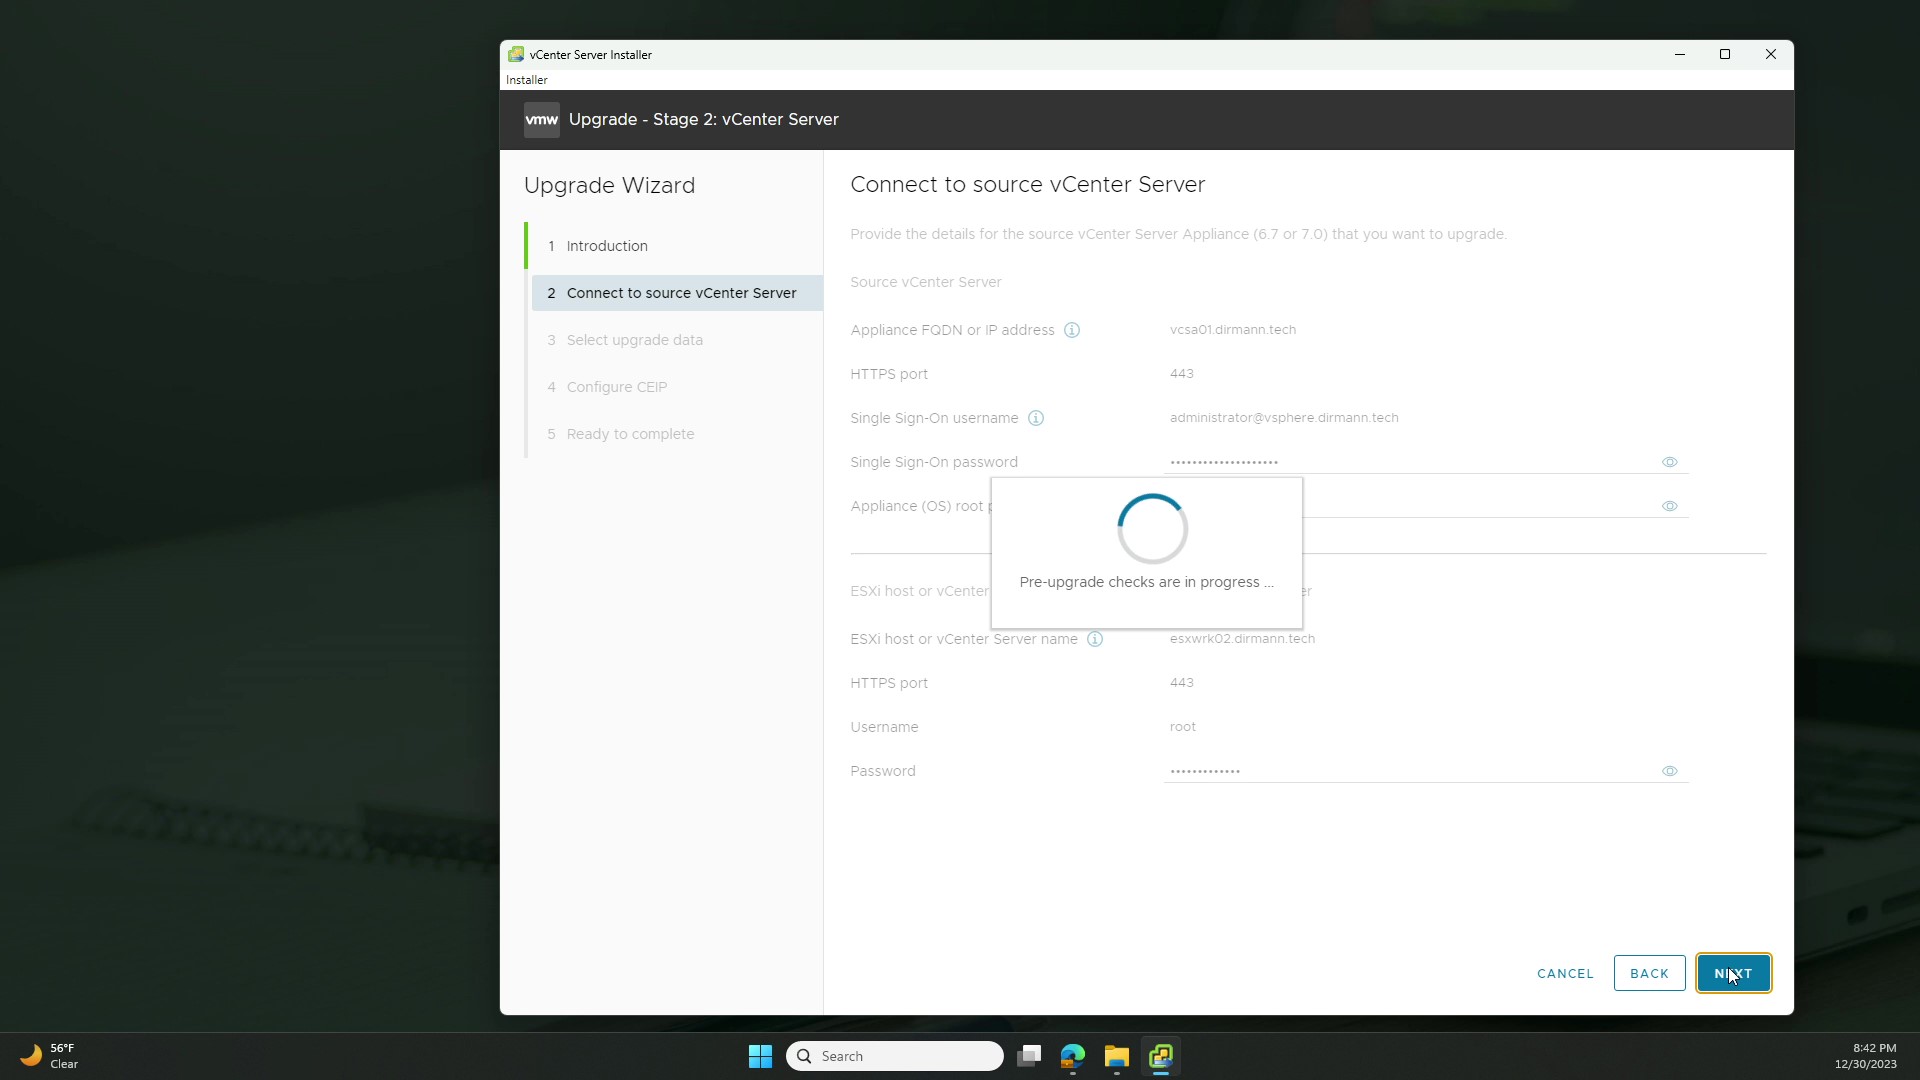
Here’s where the fun begins. We need to provide the hostname/IP address for the VCSA that we wish to upgrade and it’s HTTPS port (default is 443). Then, click the ‘Connect to source’ button.
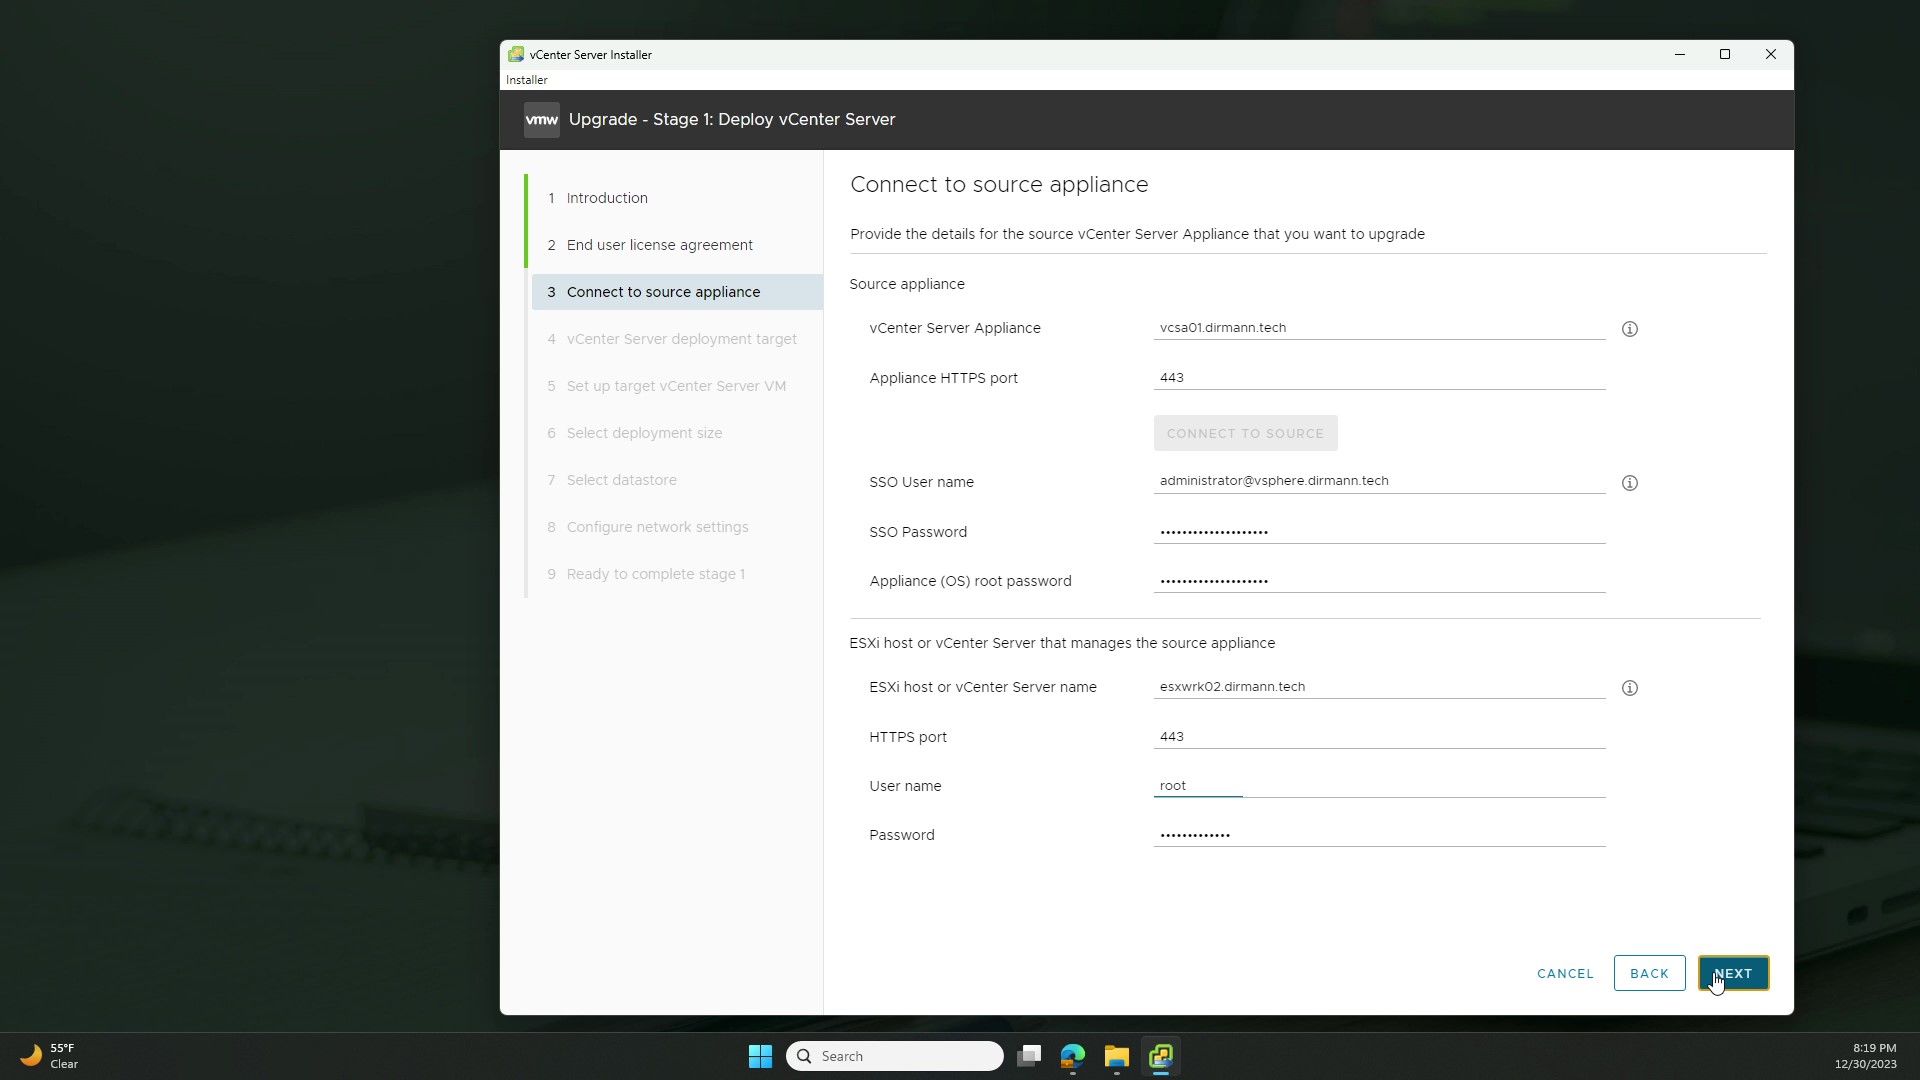
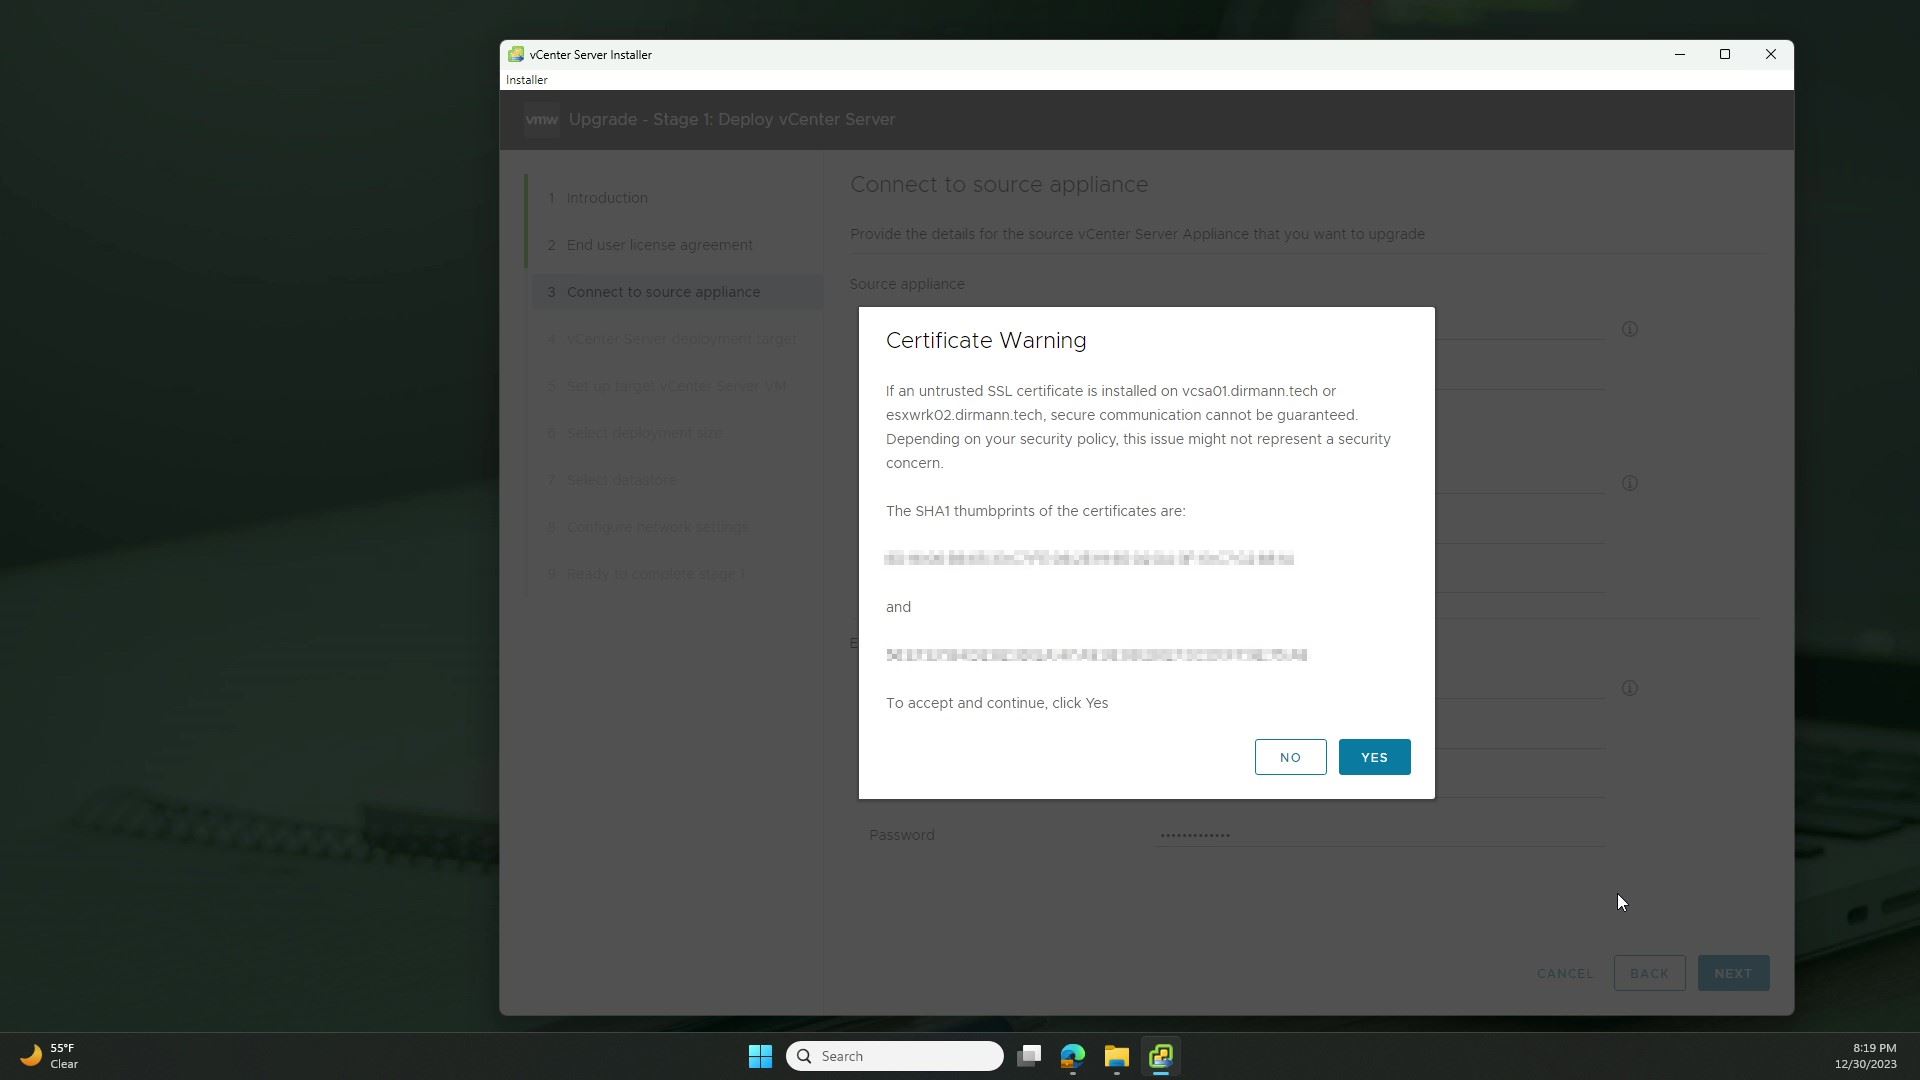
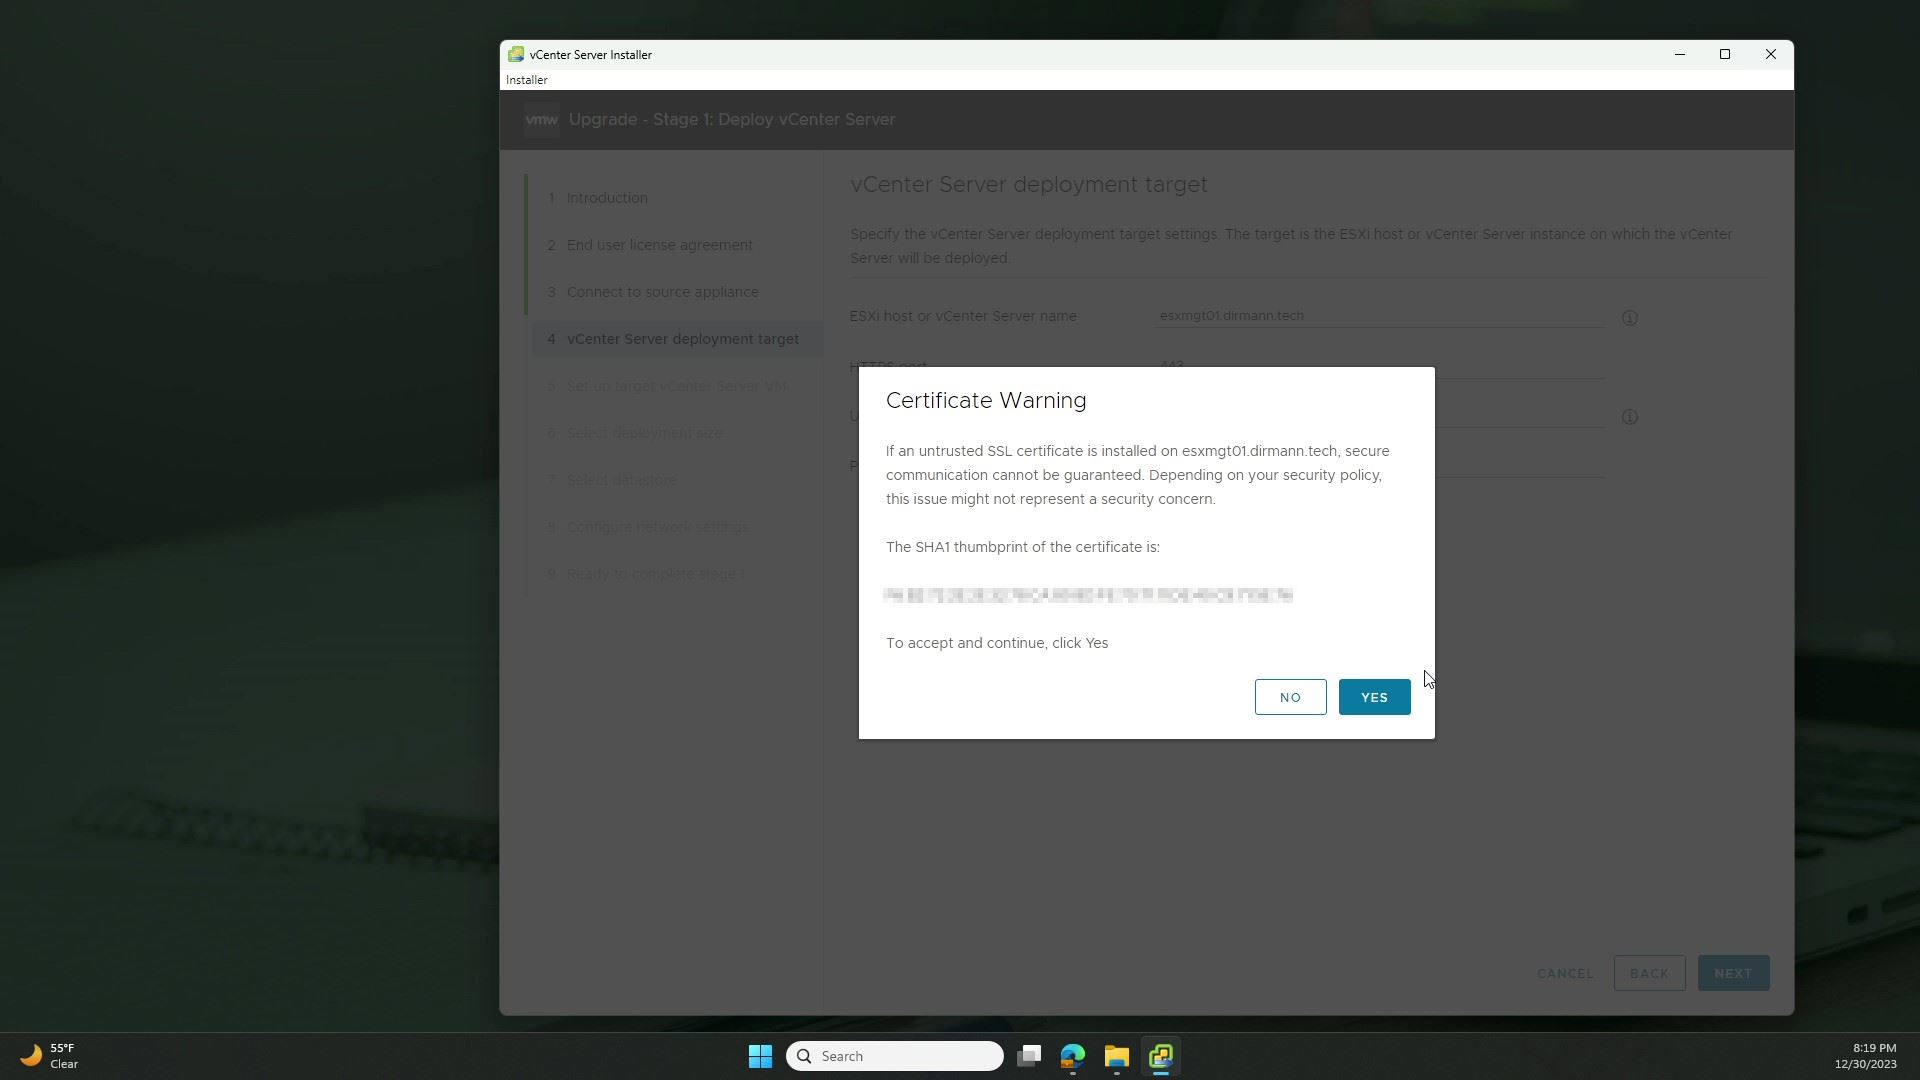
Once connectivity is verified, we have to provide the SSO Administrator credentials, root password of the existing VCSA, and hostname, HTTPS port, and credentials to access the host where the existing appliance resides. Upon clicking ‘Next’, you’ll be presented with the certificate thumbprints of the VCSA and the ESXi host for verification. Confirm they are accurate and click ‘Yes’.
Now, we need to provide the hostname/IP address, HTTPS port and proper credentials for the ESXi host where the NEW VCSA will be deployed. Again, when you click ‘Next’ you will be presented with the certificate thumbprint for that host. After verifying, click ‘Yes’ to continue.

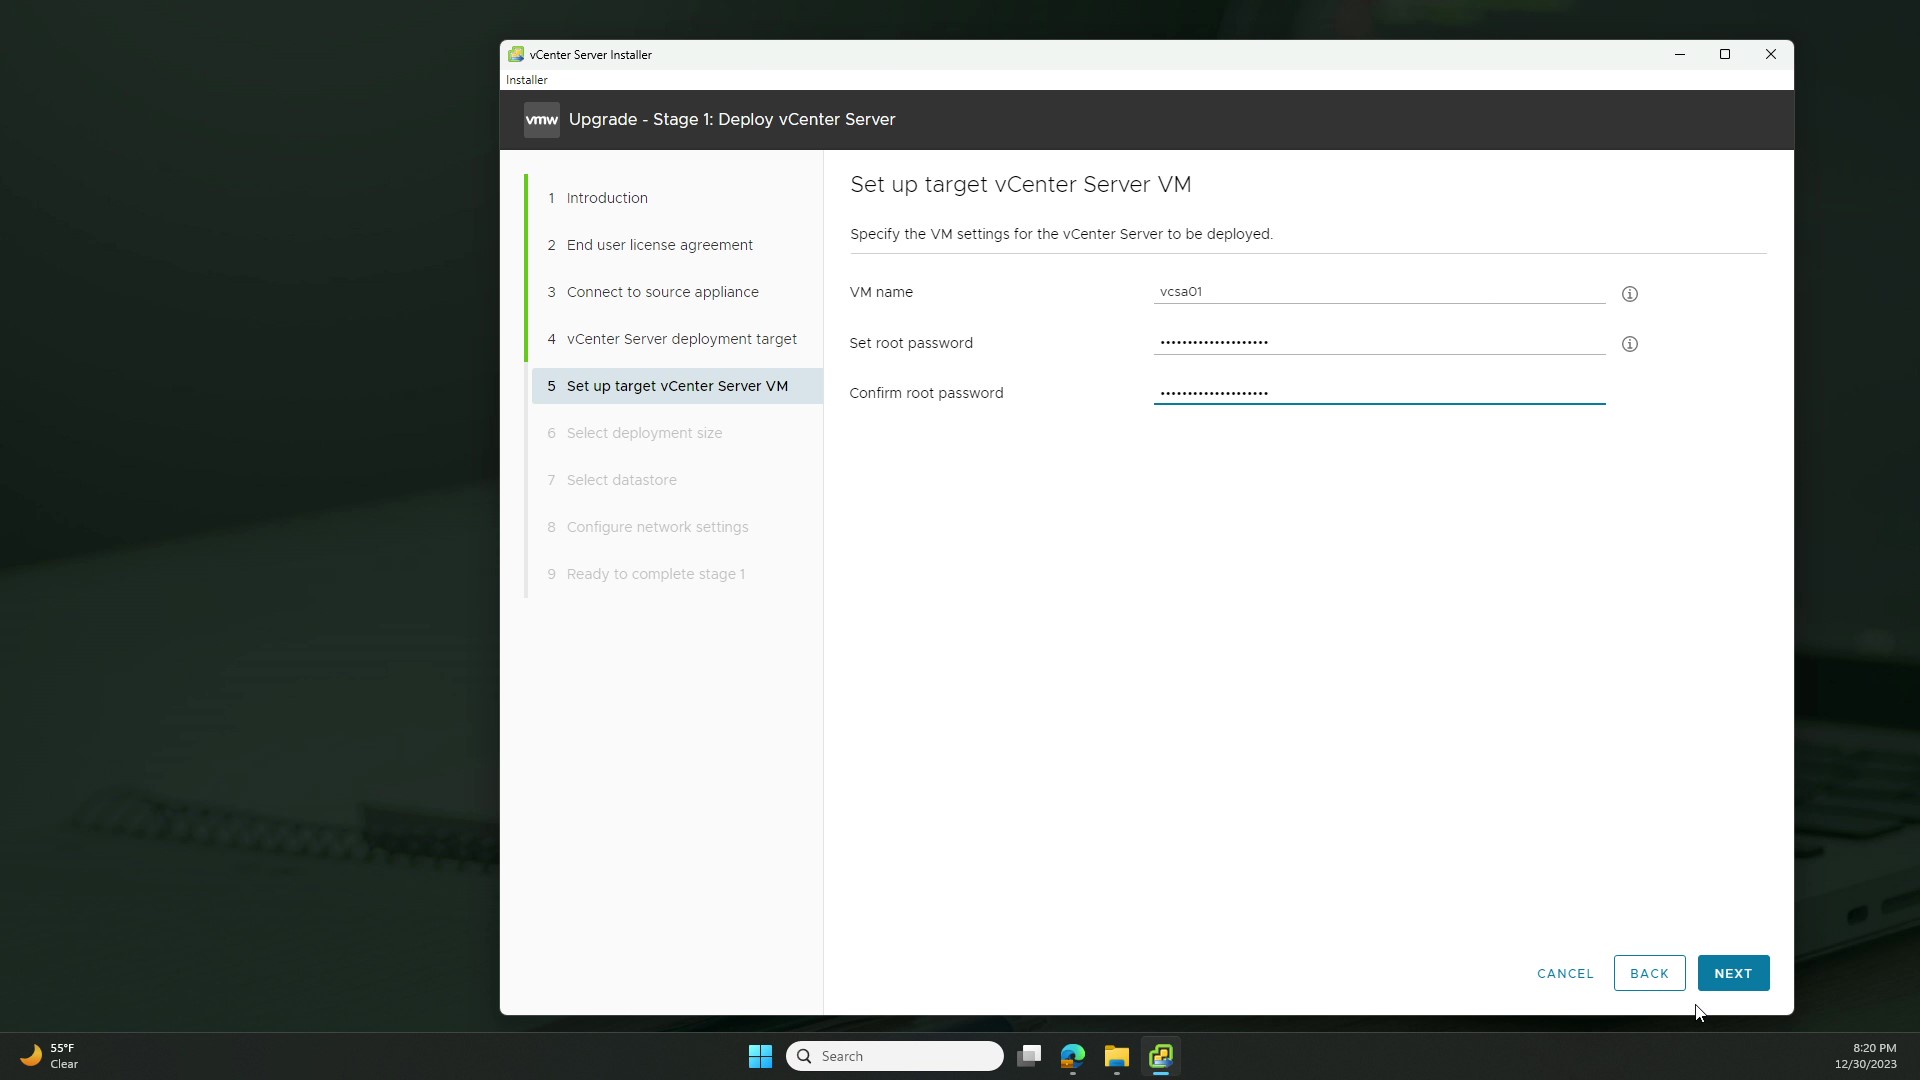
Here, we need to supply the inventory name of the new VCSA appliance and the password for the new ‘root’ account. As I previously mentioned, I renamed my source VCSA’s inventory name because I wanted to re-use it for the new appliance. Once completed, click ‘Next’.
On to the appliance’s deployment size. This determines the number of resources to allocate to the VM. Keep in mind that the resources can always be manually increased later, if needed. Technically, for our deployment a ‘Tiny’ size would suffice, but we decided to bump it up to ‘Medium’ to accommodate some anticipated growth.
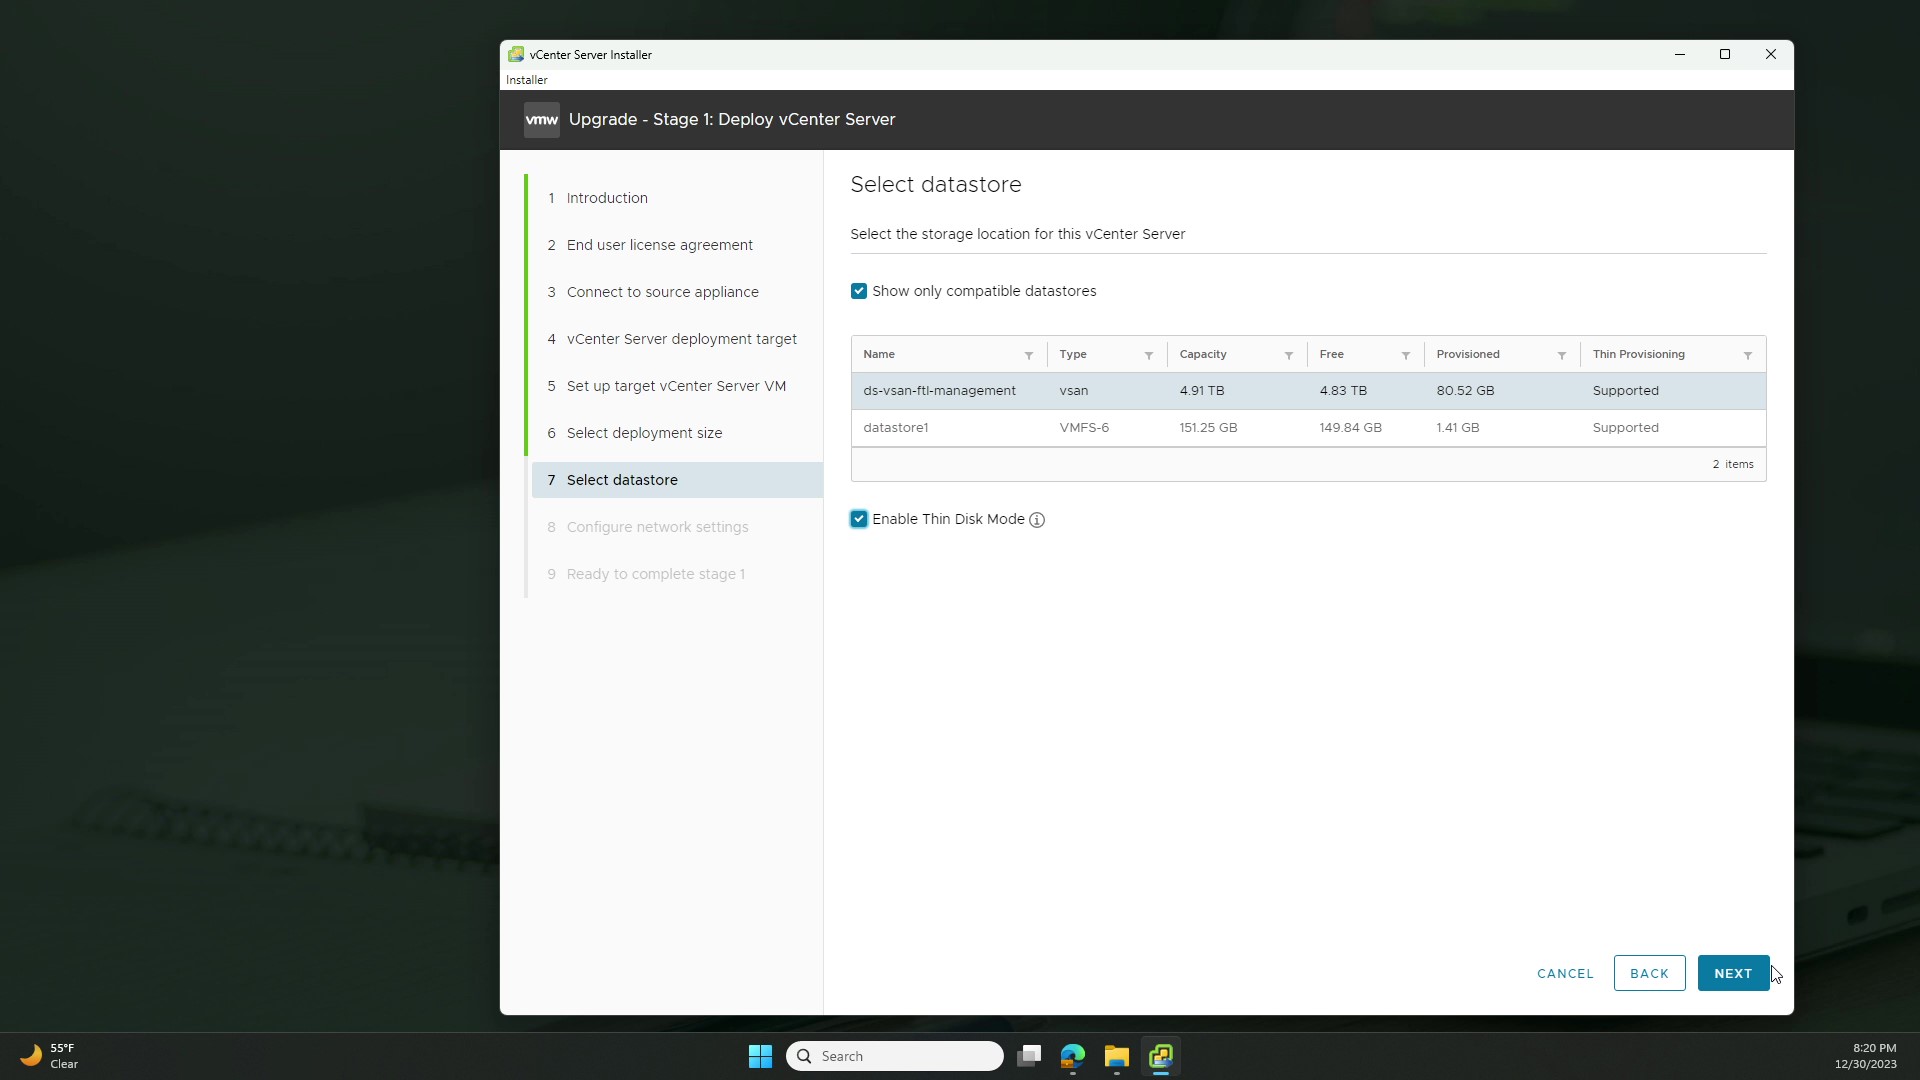
Here we have to select what datastore we want to store the VM on and whether or not to use thin provisioning to conserve disk space, which we opted to do.
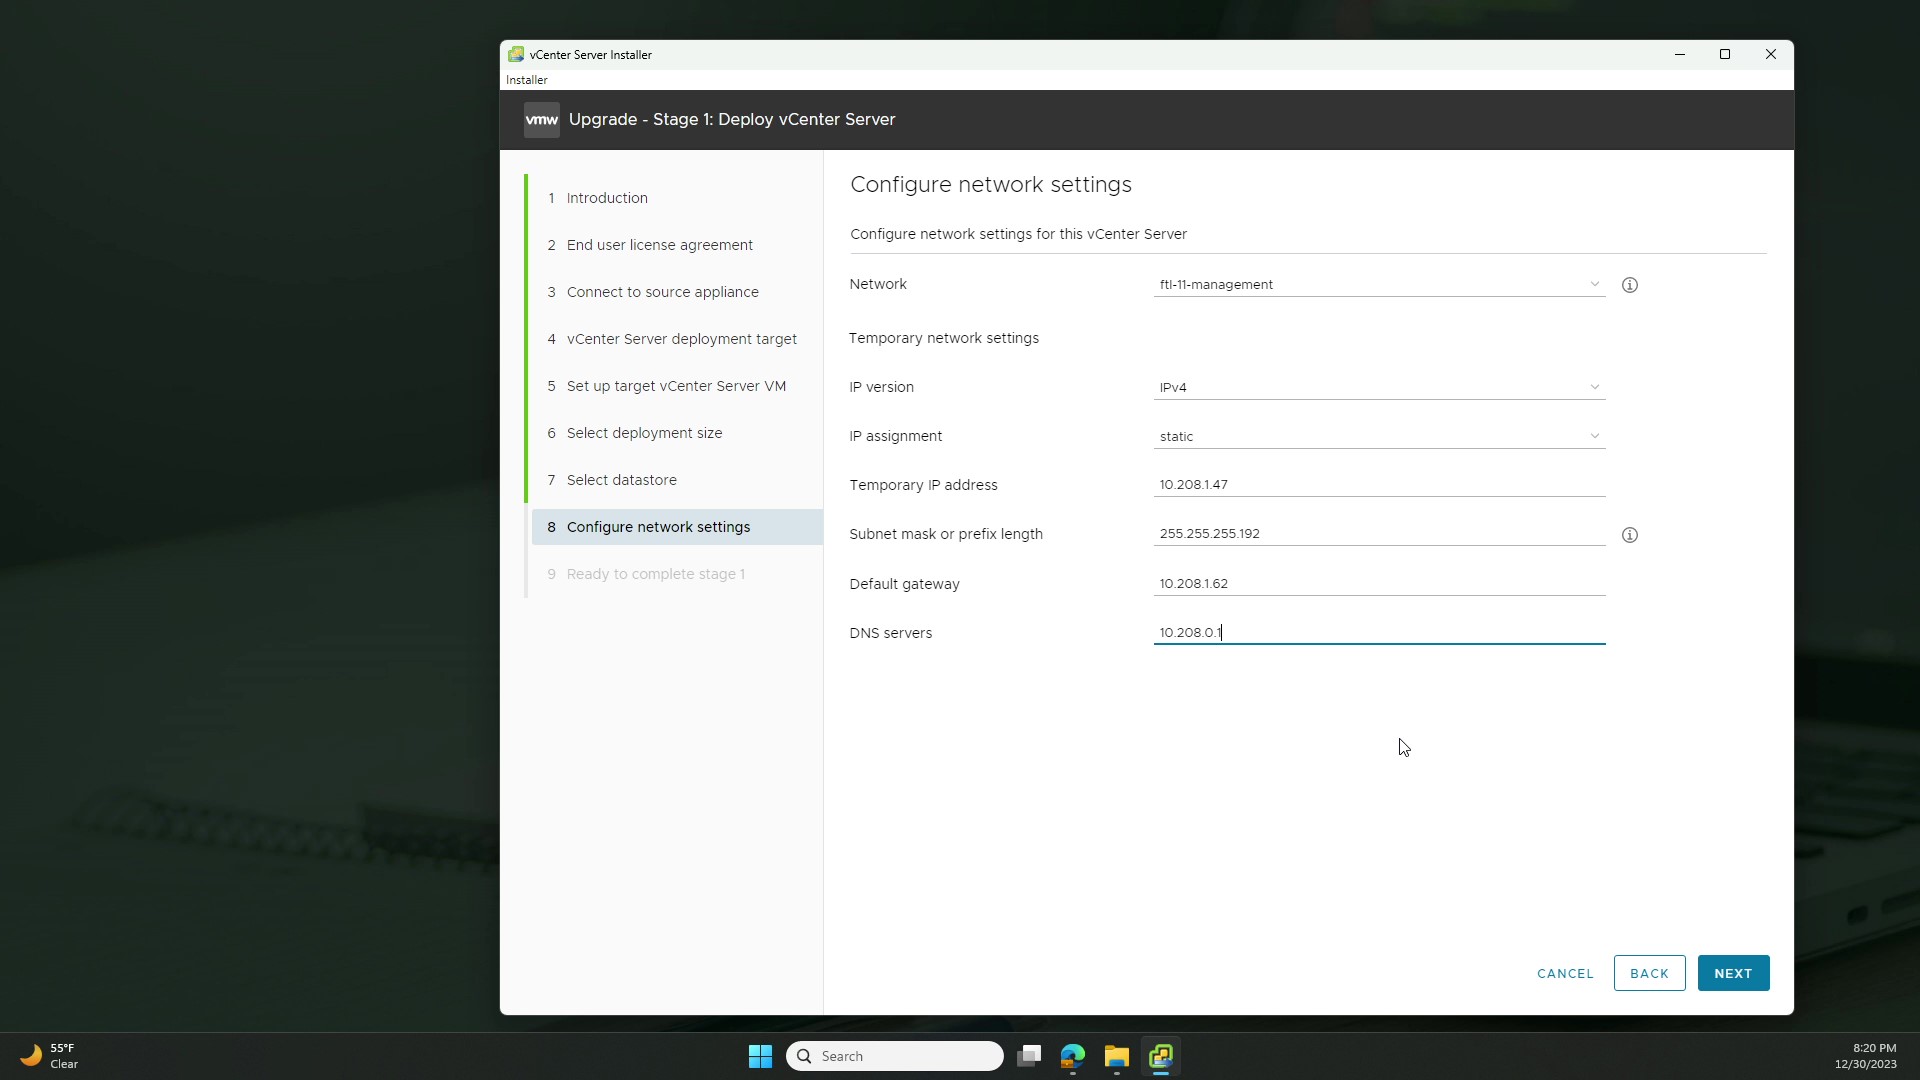
Finally, we are to the network settings. Here, we are going to be using a static IP so we need to select that option and provide the appropriate details. Yes, I know we only added a single DNS server here creating a single point of failure. Like I mentioned, the lab has seen better days, and this is on our list to remediate.
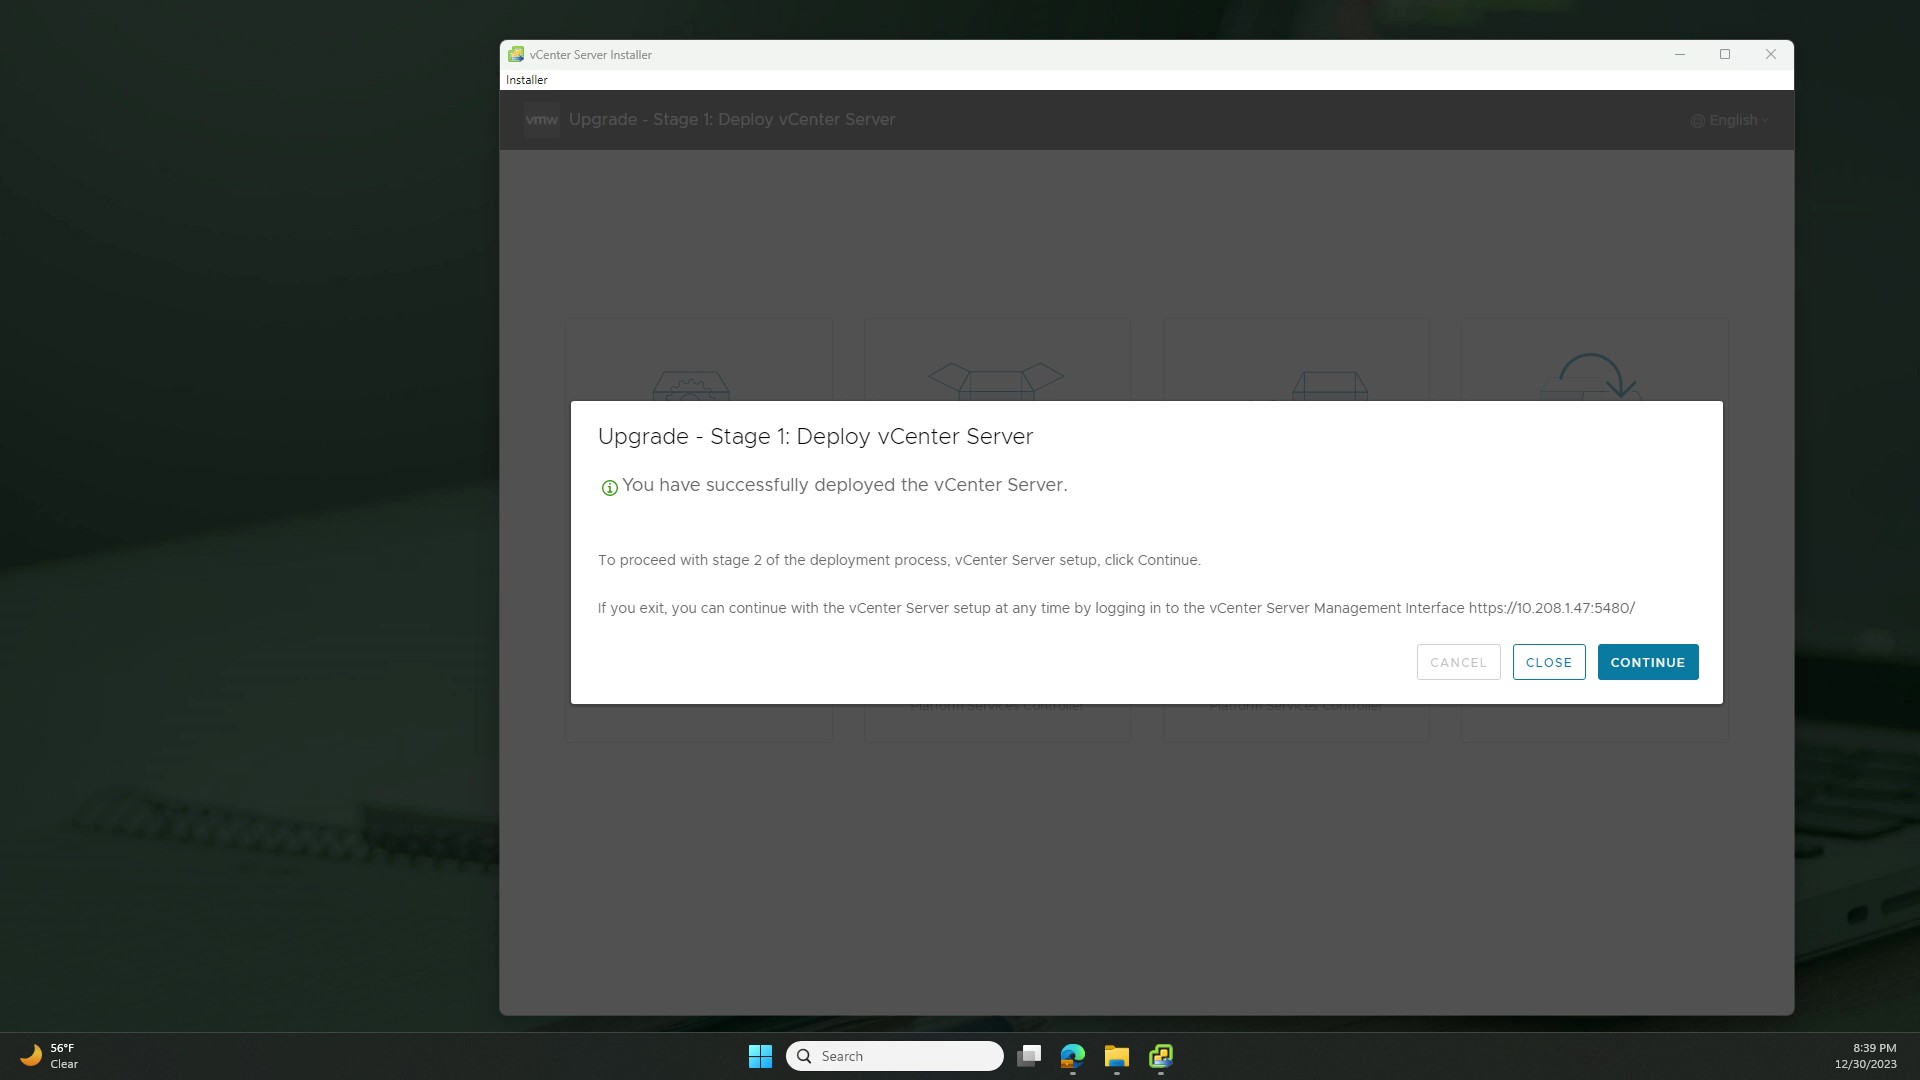
After clicking ‘Next’, we’re presented with a summary page of all the details we just provided. Give it a once-over, and it all is well, click ‘Finish’ to start Stage 1 deployment. When it’s done, we can click ‘Continue’ to start Stage 2.

Break Time
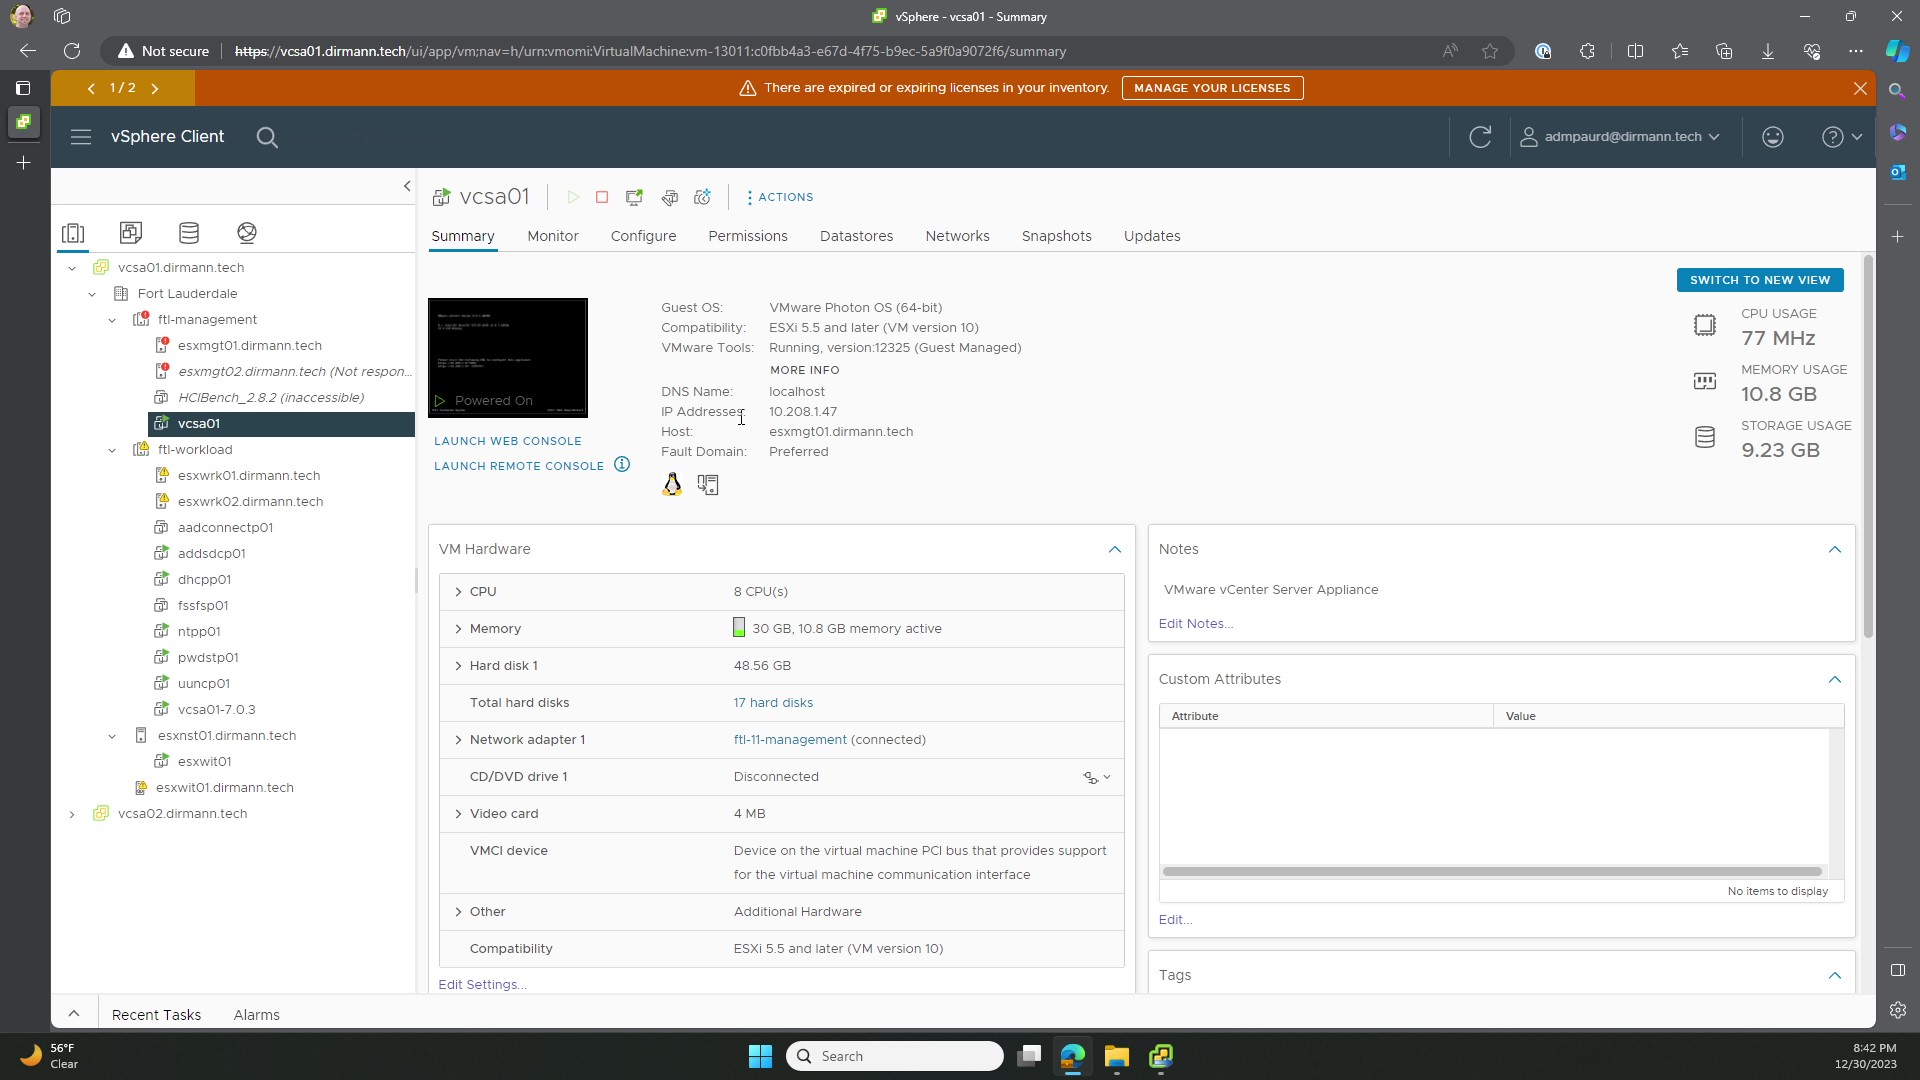
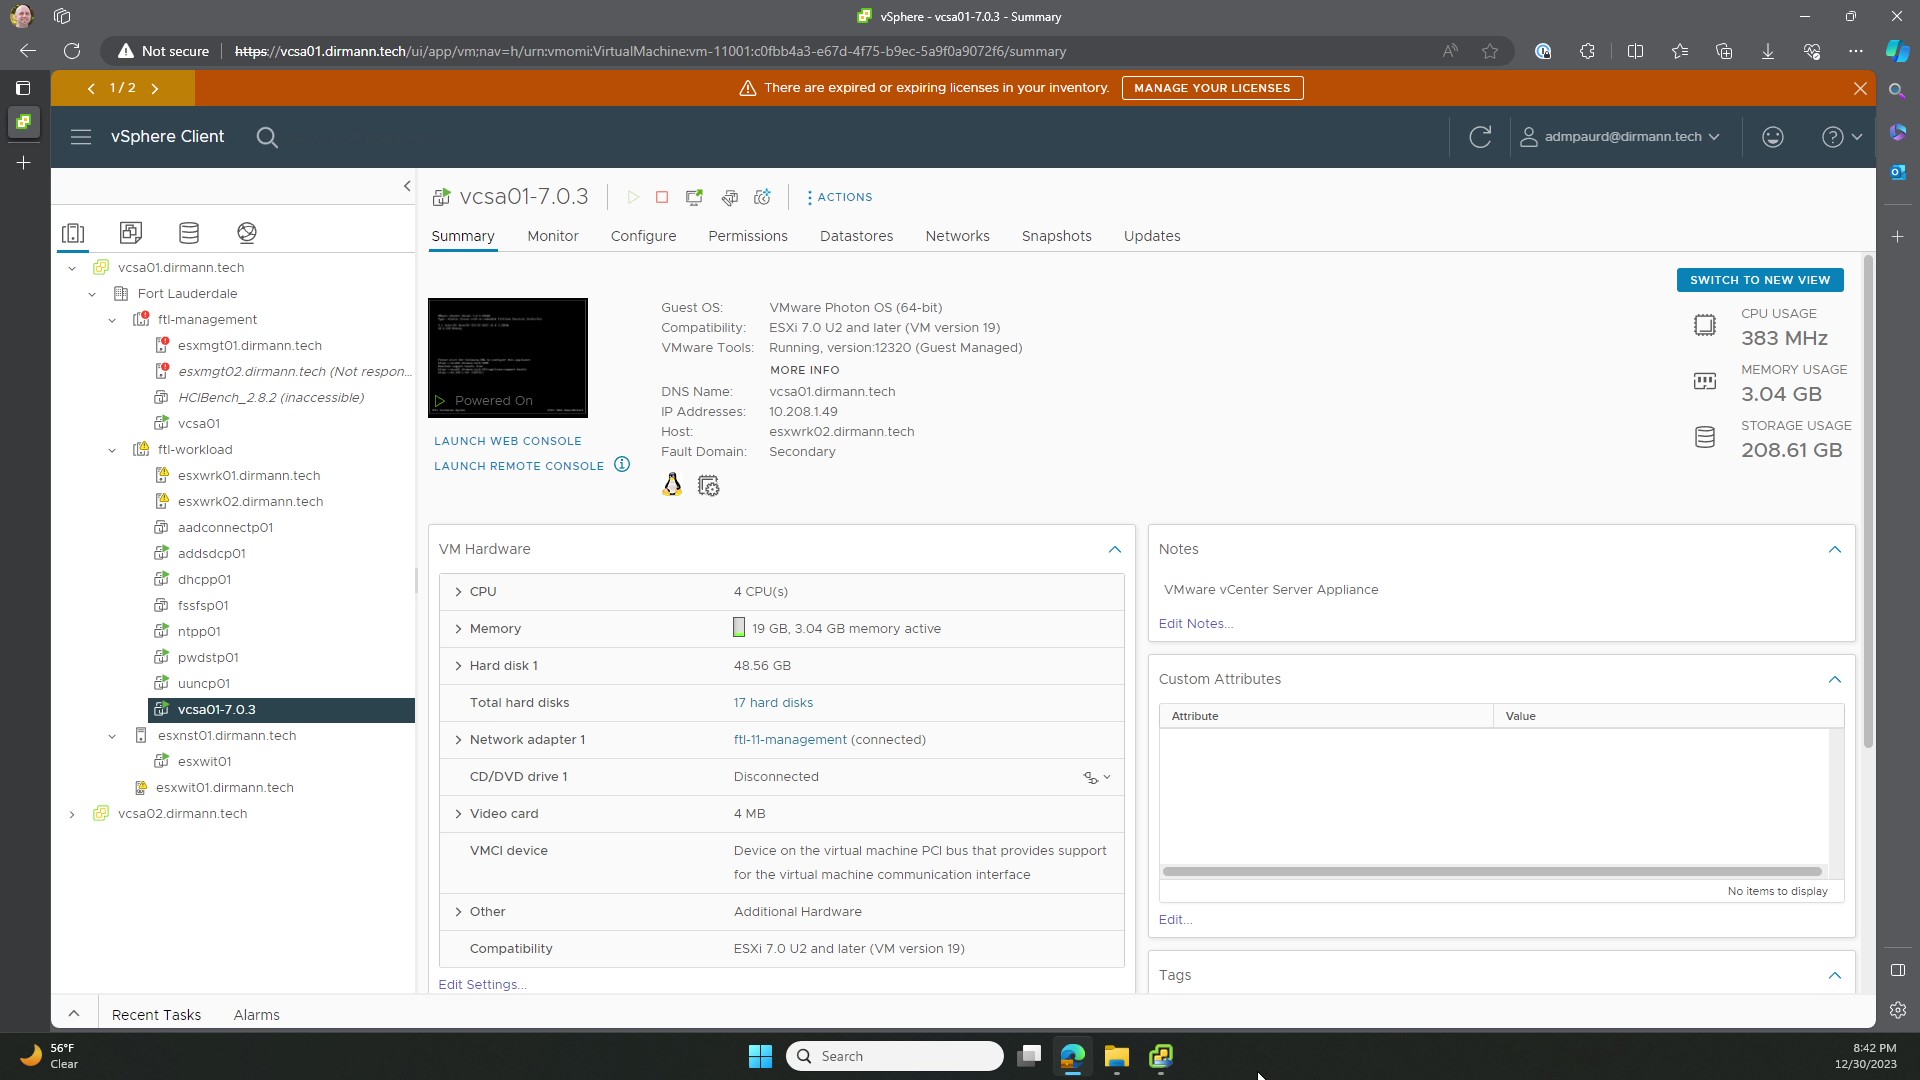
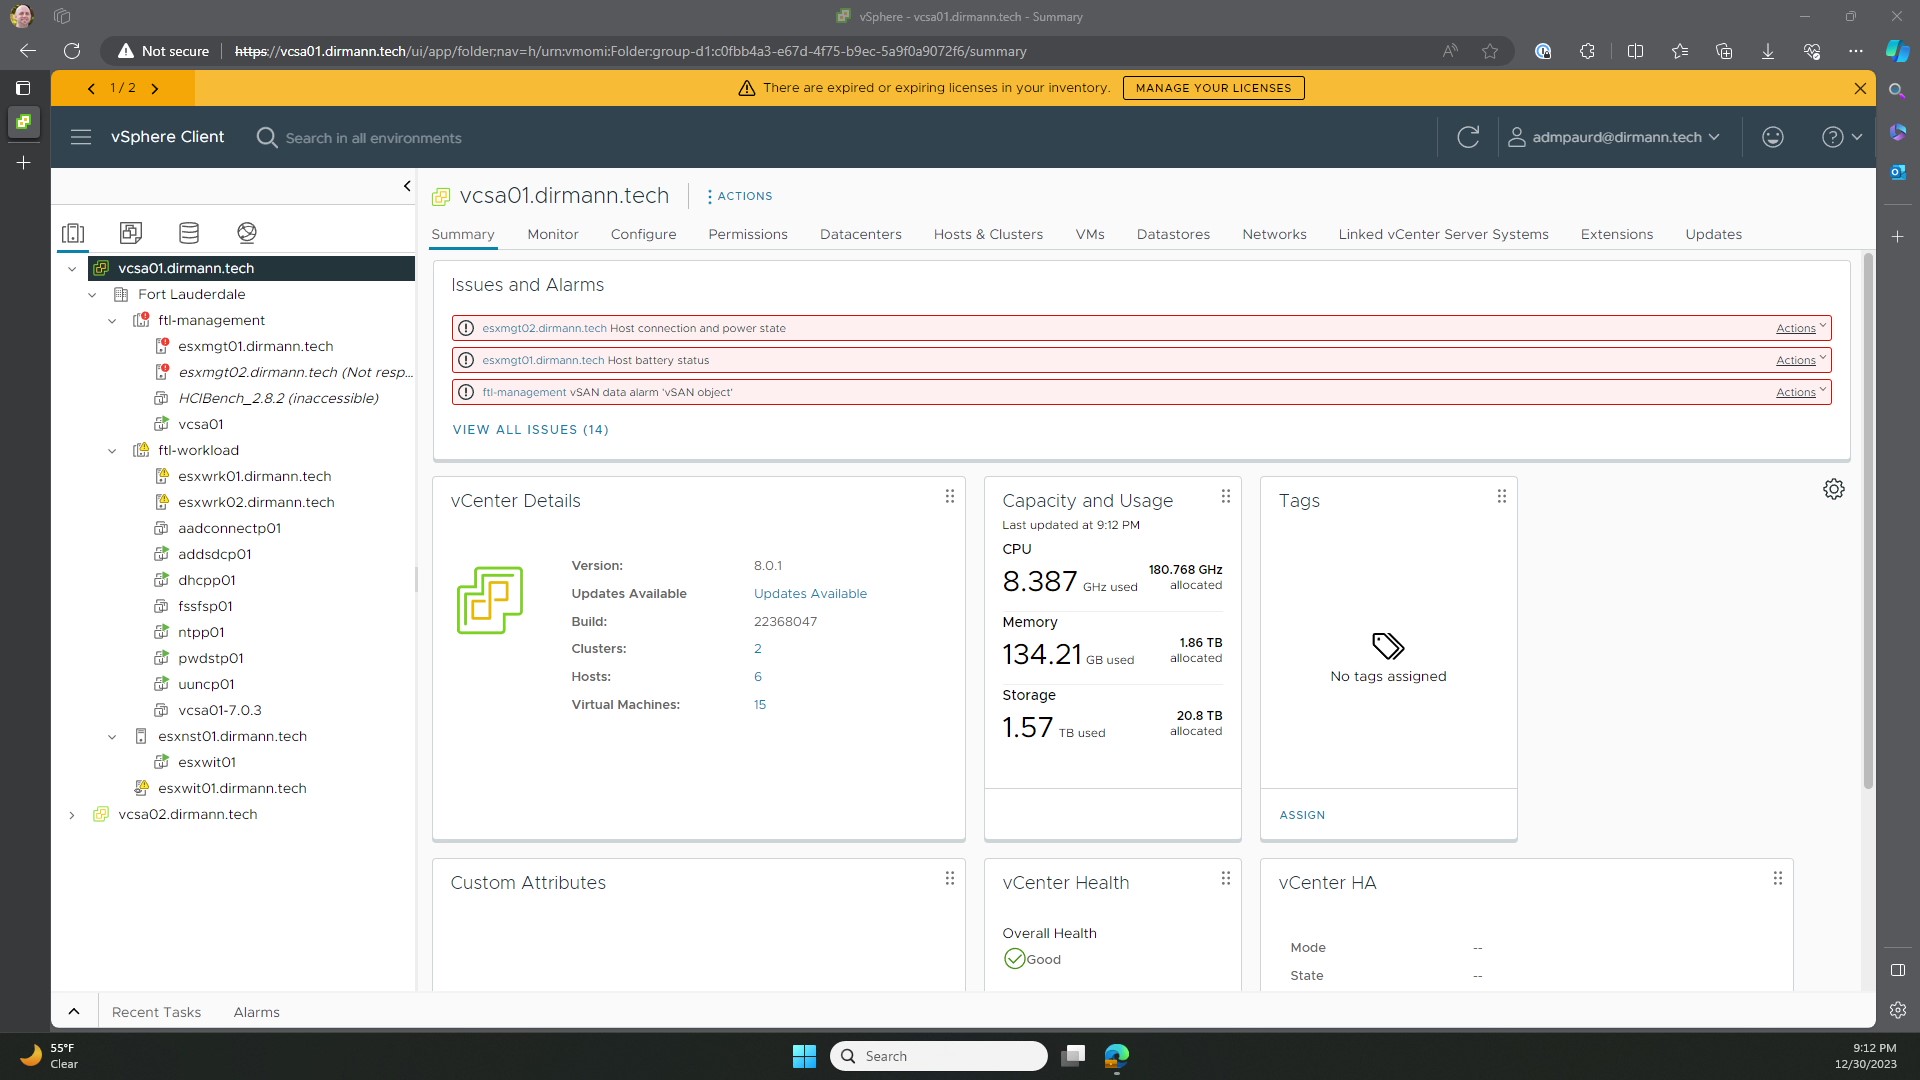
Okay, pause…so what is actually happening here? Stage 1 is where the new VCSA is deployed to the destination host, powered on, and configured with the network settings that you provided. The image on the left shows us still in the 7.0.3 VCSA, but that the 8.0.1c VCSA was deployed to the proper host with the temporary IP address that we provided. We also see our source VCSA still powered on, with its existing configuration shown in the image on the right.
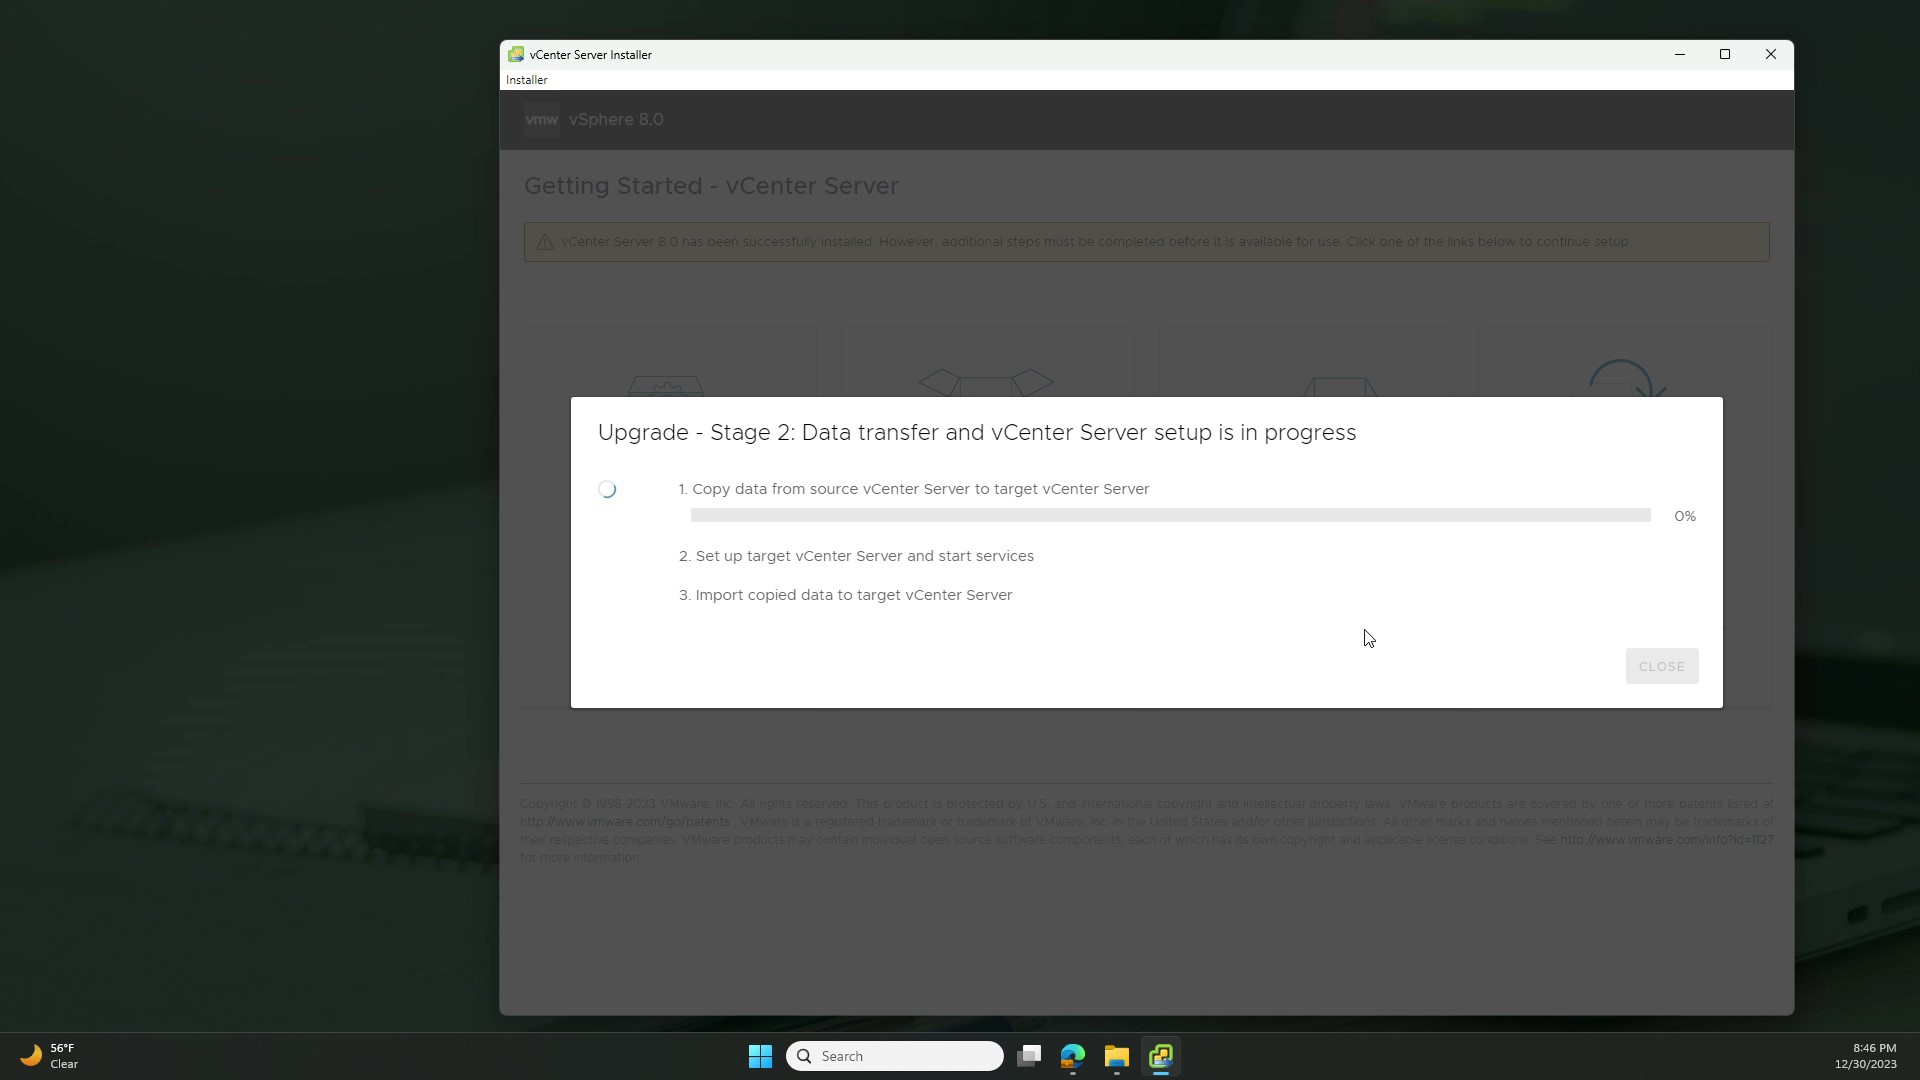
Initiating Stage 2 Sequence
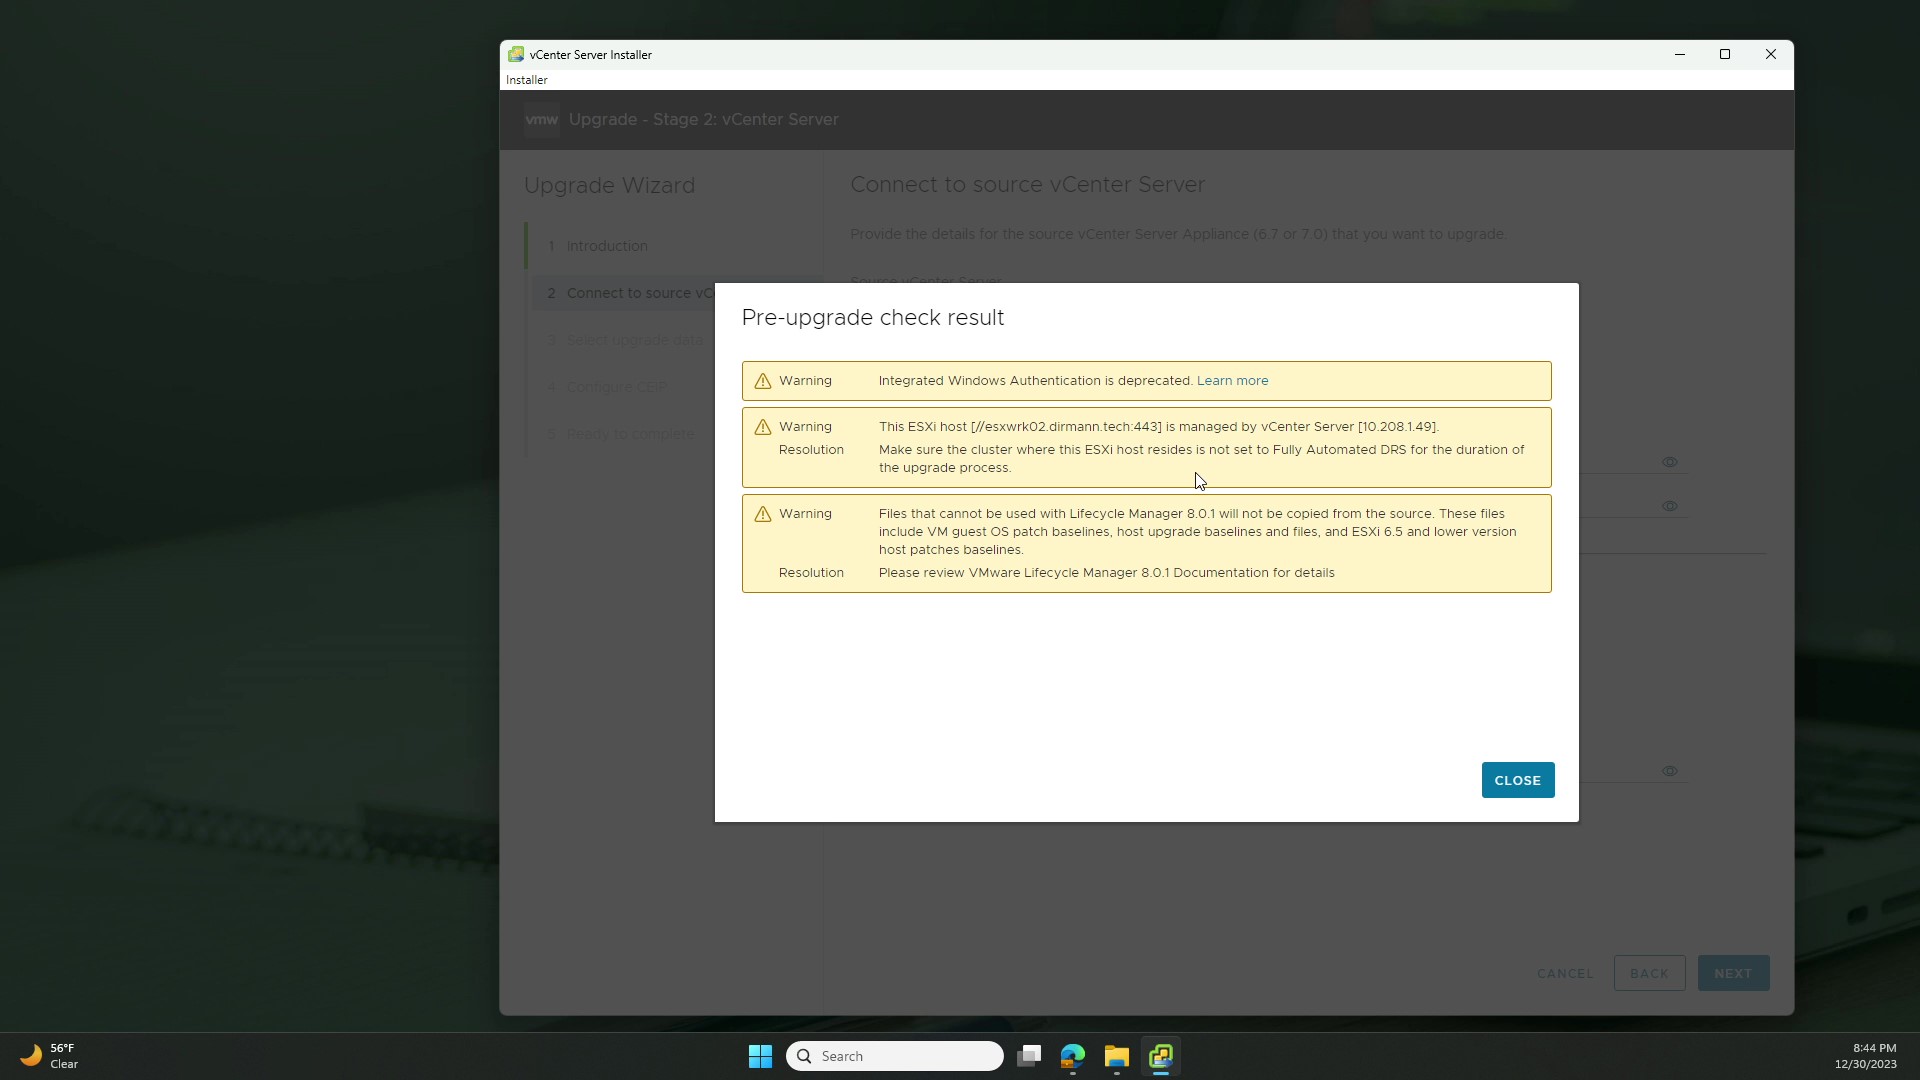
We now see the overview for Stage 2 and can proceed by clicking ‘Next’. The installer runs through a slew of pre-checks. Some of them may need to be remediated immediately before continuing, and others may just be considered warnings and will allow you to proceed. Or, you may have a completely clean bill of health. In our case, we had a few warnings as you can see. We are going to go ahead and continue but remediate these in upcoming content.
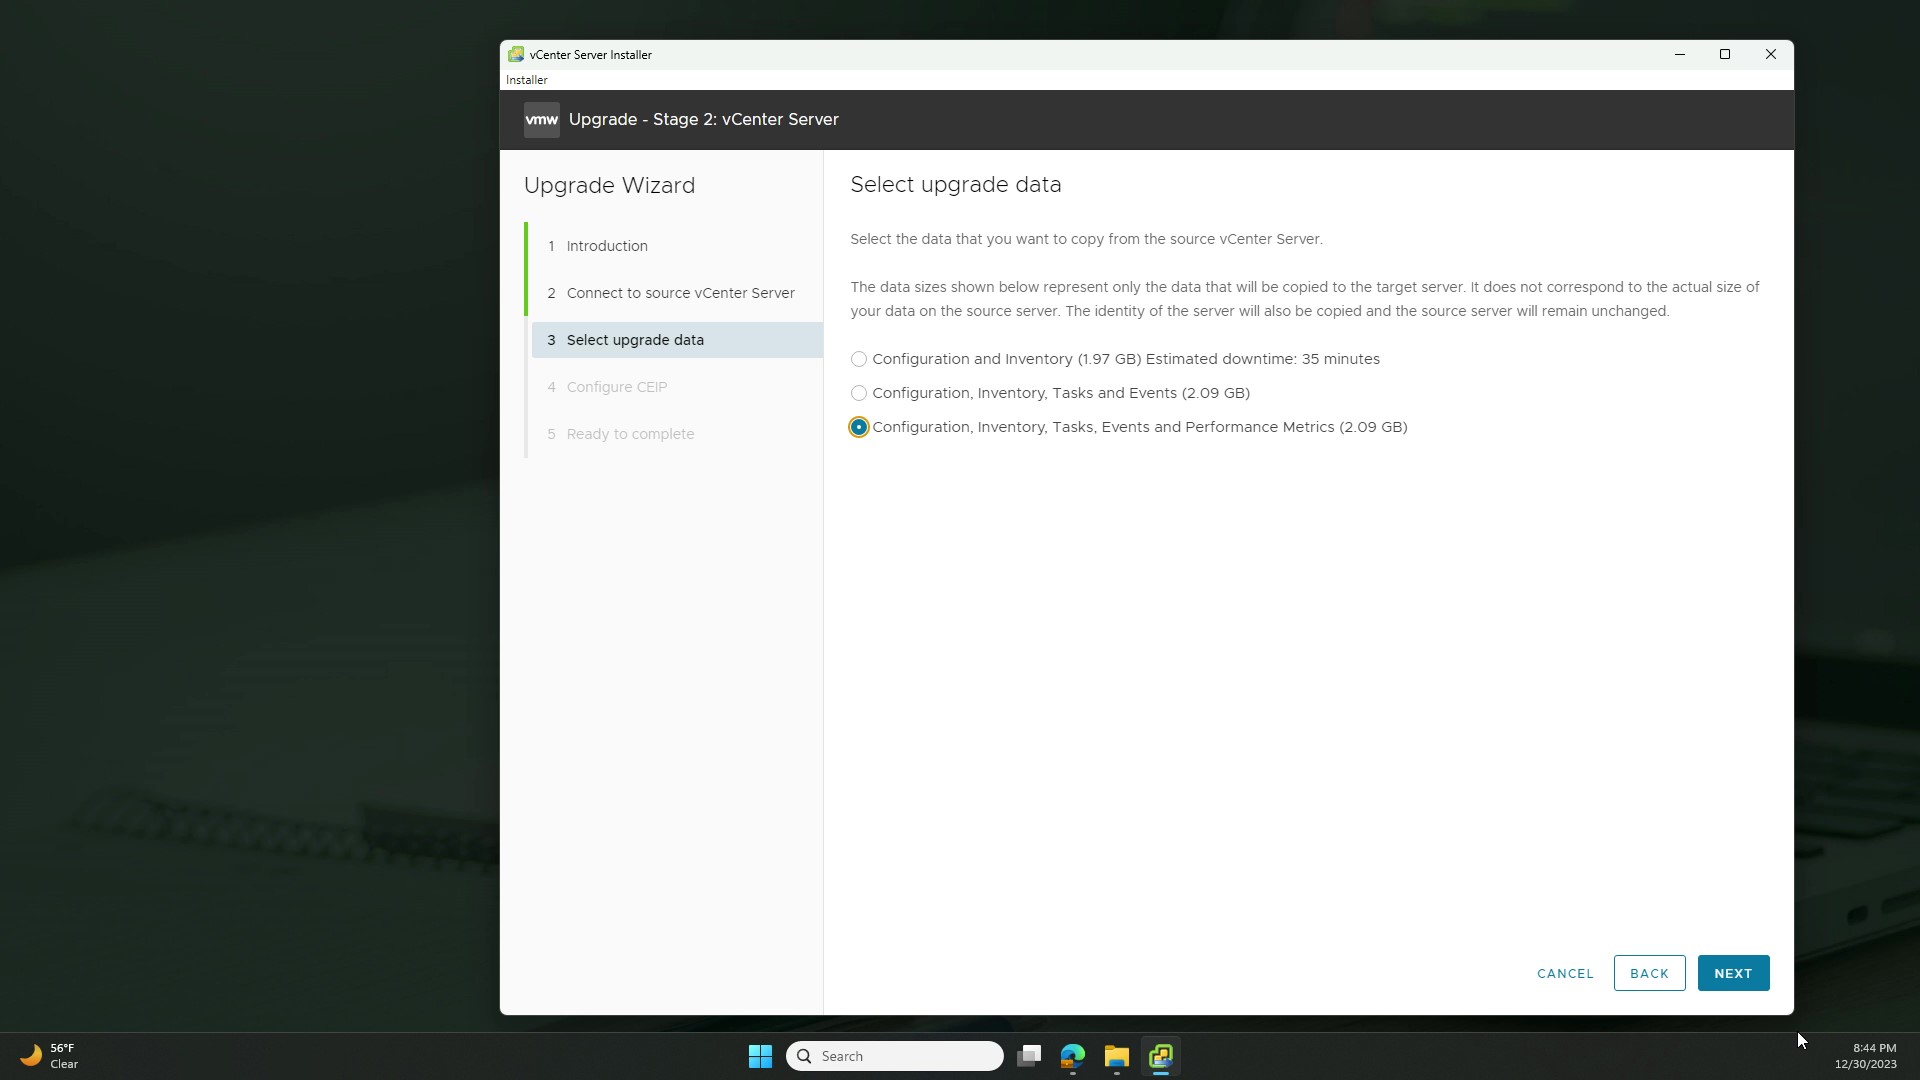
We now have three options of what data we want to migrate over to the new appliance. Each option has the same data as the previous, with an additional chunk added on. The more data you migrate, the longer the process will take. We opted to move all data, but we are only dealing with 2.09GB so this is going to migrate fairly quickly.
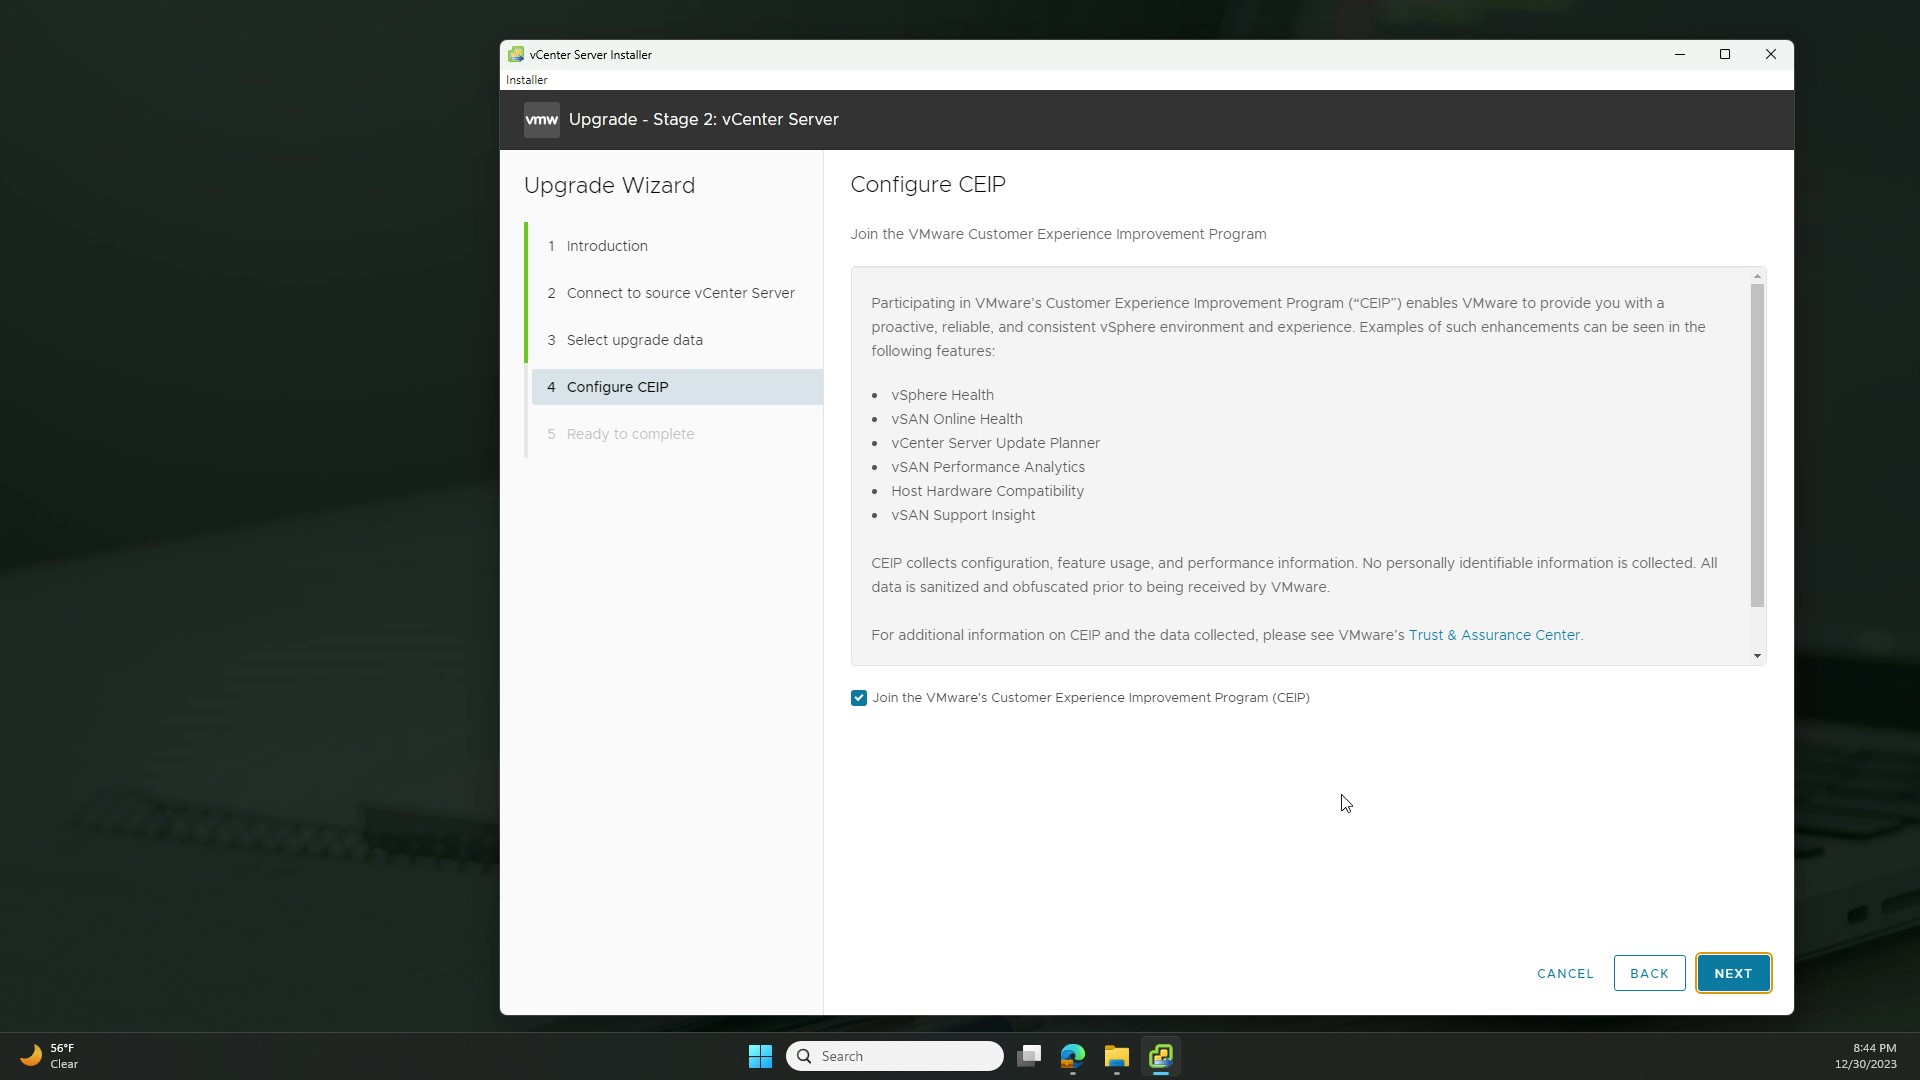
If you wish to join VMware’s CEIP, go ahead and opt in and click ‘Next’.
We made it. We are at the final step. VMware wants to ensure that you’ve taken proper recovery steps to protect yourself just in case. Personally, I have never run into an issue where data in the appliance gets corrupted due to this process but to protect yourself you should log into the VAMI (https://[FQDN of your source VCSA]:5480) and kick off a manual configuration backup. This is an additional level of protection, just in case. Confirm you have taken the backup and click ‘Finish’ to start Stage 2.

Break Time – Stage 2
When Stage 2 starts, you immediately see that it is broken up into three steps. I want to take a moment and depict what each step is doing –
- In this step, configuration data such as hostname, original IP address, etc. gets copied. Once this is completed, the source VCSA is shutdown to avoid any conflicts.
- The 8.0.1 VCSA gets configured, and services are restarted to officially bring the VCSA online with the original configuration.
- As you see, data from the source VCSA such as inventory, tasks, performance metrics, etc. gets imported into the destination appliance.
Finish Line
After the data import is completed, you can log in to the new appliance and you’ll notice that your source appliance is still there but powered off. I would suggest keeping it like this until you are comfortable that your new appliance is operating with issues. Since this upgrade process deploys a net new 8.0.1 appliance, the roll back is pretty straight forward – power off the 8.0.1 appliance, and power on the 7.0.3 appliance.
Conclusion
…And that’s it! We did it! We’re now running VCSA 8.0.1c! This is just the first step to cleaning up and building out our enterprise lab so make you tune in to the blog and YouTube channel for additional content. Thanks for reading. If you enjoyed the post, make sure you check us out at dirmann.tech and follow us on LinkedIn, Twitter, Instagram, and Facebook!

Paul Dirmann (vExpert PRO*, vExpert***, VCIX-DCV, VCAP-DCV Design, VCAP-DCV Deploy, VCP-DCV, VCA-DBT, C|EH, MCSA, MCTS, MCP, CIOS, Network+, A+) is the owner and current Lead Consultant at Dirmann Technology Consultants. A technology evangelist, Dirmann has held both leadership positions, as well as technical ones architecting and engineering solutions for multiple multi-million dollar enterprises. While knowledgeable in the majority of the facets involved in the information technology realm, Dirmann honed his expertise in VMware’s line of solutions with a primary focus in hyper-converged infrastructure (HCI) and software-defined data centers (SDDC), server infrastructure, and automation. Read more about Paul Dirmann here, or visit his LinkedIn profile.
Share this article on social media: